French tips are supposed to look effortless.
But in real life? One hand looks salon-clean… and the other looks like you tried to paint a tiny white fence in a moving car.
If that’s you, you’re not “bad at nails.” You’re just using the wrong brush.
Because here’s the secret: French tips aren’t about having steadier hands. They’re about having a brush that does the steady part for you. Let’s fix it.
In This Article
- TL;DR
- The best nail art brush for French tips (quick answer)
- Brush Type #1: Liner brush (the smile-line maker)
- Brush Type #2: Angled detail brush (the “cheat code” for symmetry)
- Brush Type #3: Clean-up brush (the edge eraser)
- How to do French tips with a nail art brush (step-by-step)
- Common French tip problems (and quick fixes)
- FAQs
TL;DR
Quick answer: The best nail art brush for French tips is a 7–12mm liner brush for the smile line. For cleaner symmetry, add an angled detail brush. For crisp edges, finish with a short clean-up brush dipped in remover.
The best nail art brush for French tips (quick answer)
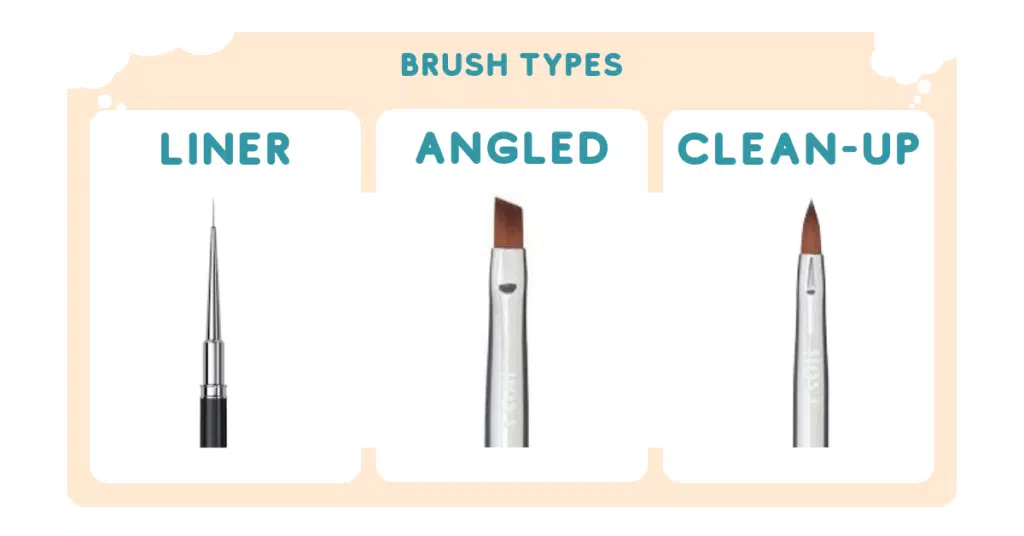
If you want crisp French tips without fighting your tools, these are the three brushes that matter:
- Ultra-thin liner brush (7–12mm) – for drawing the smile line
- Angled/flat detail brush – for shaping and correcting the curve
- Clean-up brush (short, firm bristles) – for razor-sharp edges around the cuticle and sidewalls
If you’re only buying one? Start with the liner brush. It’s the “make it look neat” brush.
Want to build a full brush kit (not just for French tips)? See my guide to best professional nail art brushes for clean lines, detailing, and beginner-friendly sets.
Shop nail liner brushes on Amazon
Disclosure: This post contains affiliate links. If you buy through them, we may earn a small commission at no extra cost to you.
| Brush type | Best for | Beginner-friendly? | Buy if you… |
|---|---|---|---|
| Liner brush (7–12mm) | Drawing the smile line | ✅ Yes | Want clean curves fast |
| Angled/flat detail brush | Fixing symmetry + corners | ✅ Yes | Struggle with uneven sides |
| Clean-up brush (short + firm) | Sharp edges + cleanup | ✅ Yes | Want “salon-finished” borders |
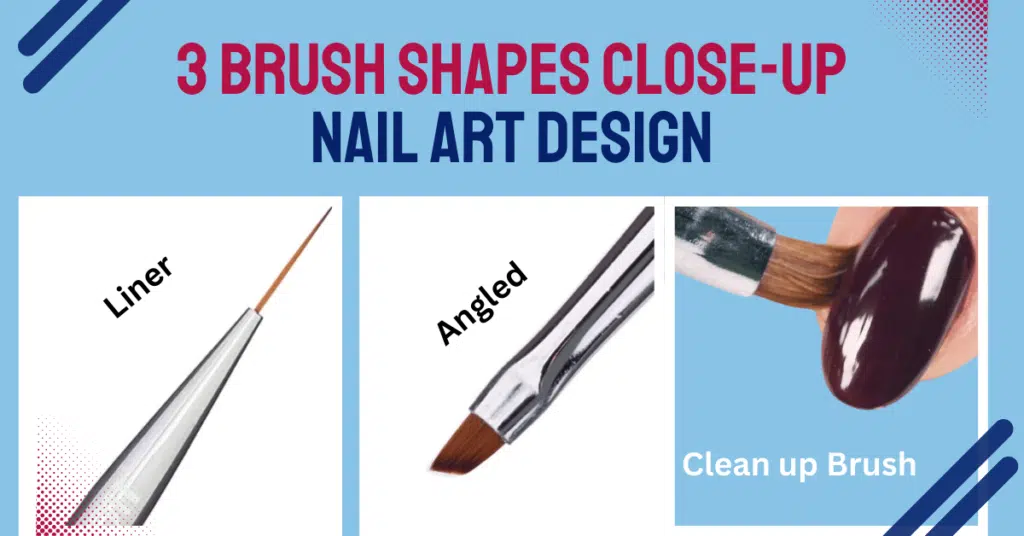
Brush Type #1: Liner brush (the smile-line maker)
This is the brush that turns French tips from “thick stripe” to “clean curve.”
What to look for
- Long, thin bristles (7–12mm is beginner-friendly)
- A tip that stays pointed, not frayed
- Comfortable handle (because your grip matters more than you think)
Best for
- Drawing the smile line first
- Thin, elegant French tips (not chunky)
Pro tip: Don’t load it like a paintbrush. Wipe one side off — you want controlled product, not a blob.
Shop liner brushes for French tips on Amazon
Brush Type #2: Angled detail brush (the “cheat code” for symmetry)
If your smile line looks different on every nail (it happens), the angled brush is your best friend.
Why it works: the shape naturally creates a curve. It’s like tracing with a stencil… but softer.
Best for
- Fixing uneven sides
- Sharpening the corners of the French tip
- Making both hands look like they were done by the same person
Shop angled nail art brushes on Amazon
Brush Type #3: Clean-up brush (the edge eraser)
This is the brush that makes people say, “Wait… you did that yourself?”
A clean-up brush is usually short, firm, and slightly rounded. You dip it into remover (or slip solution, depending on your product) and carve the edges clean.
Best for
- Crisp sidewalls
- Clean cuticle line
- Fixing little mistakes without starting over
Shop nail clean-up brushes on Amazon
Does it matter if you’re using gel or regular polish?
Yes—because dry time changes everything.
- Regular polish: Work in thin layers and let each layer set a bit before correcting. If it’s too wet, the brush will drag and smear.
- Gel polish: Cure your base fully, then paint the French tip. Clean up edges before curing (gel gives you time to perfect).
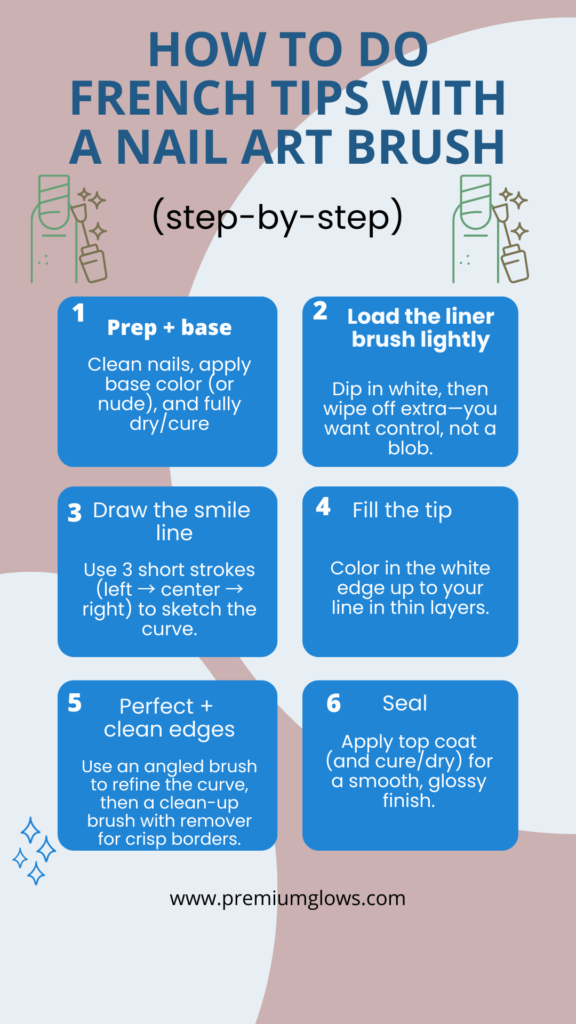
How to do French tips with a nail art brush (step-by-step)
You don’t need fancy technique. You need a simple order.
Step 1: Apply base color and cure/dry fully
If your base is tacky or moving, your tip will drag. Instant mess.
Step 2: Mark the smile line lightly
Use your liner brush and draw a thin guide curve. Keep it light — you’re sketching, not painting.
Tip: Instead of one long swoop, draw the smile line in three mini strokes: left side → center → right side. It looks smoother and feels easier.
Step 3: Fill in the white tip
Once the curve looks right, fill from the free edge down to your line.
Step 4: Perfect the curve (angled brush time)
Gently refine the curve and corners. This is where it becomes “clean.”
Step 5: Clean edges with a clean-up brush
Dip, wipe, and lightly swipe around the sides. Small movements. No scrubbing.
Step 6: Seal with top coat
Top coat hides tiny texture and makes everything look smoother than it felt while doing it.
French tips look best on a clean, even nail surface—if you’re taking off an old gel set first, follow this quick method for removing gel nail polish at home without damaging your natural nails.
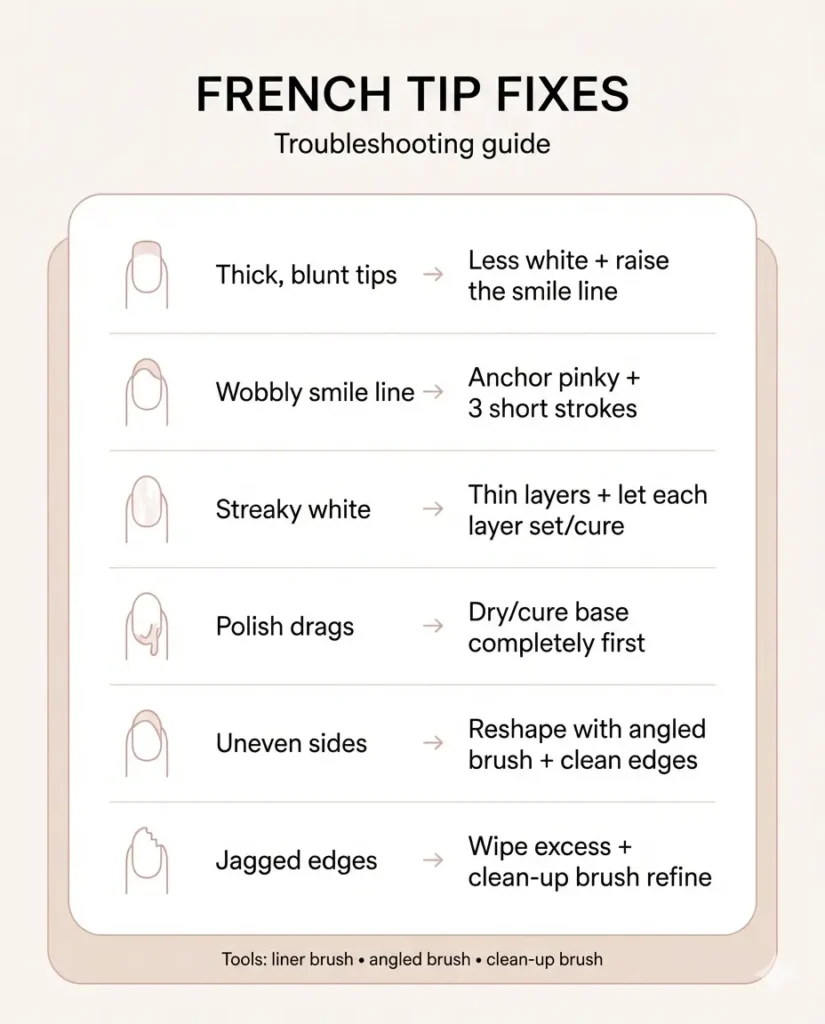
Common French tip problems (and quick fixes)
Problem: My tips look thick and blunt
Fix: Draw the smile line higher (closer to the edge) and use less product on the brush.
Problem: My line is wobbly
Fix: Anchor your pinky on the table. And work in short strokes. It’s not a single swoop situation.
Problem: My white polish drags
Fix: Let the base dry/cure fully. If it’s gel, cure it longer than you think you need.
Problem: Both hands don’t match
Fix: Use the angled brush to “standardize” the curve. Symmetry is mostly correction.
What size brush is best for French tips?
- Short nails: 5–7mm liner brush (more control)
- Medium nails: 7–12mm liner brush (most beginners love this)
- Long nails: 12mm+ if you’re confident (faster, but less forgiving)
FAQs
What brush do you use for French tip nails?
A thin liner brush for the smile line, plus an angled detail brush for shaping and a clean-up brush for crisp edges.
Can I do French tips with a regular nail polish brush?
You can… but it’s harder to control. A liner brush gives you cleaner curves with less effort.
How do you keep French tips from looking streaky?
Use thin layers, don’t overload the brush, and let each layer set/cure properly before adding more.
How do you keep French tip lines straight?
Anchor your pinky on the table and use short strokes. Let the brush do the precision—your hand just guides it.
What brush is best for thin French tips?
A long liner brush with a fine point (7–12mm) gives the cleanest, thinnest line.
How do you fix French tips that look uneven?
Use an angled brush to reshape the curve, then a clean-up brush to sharpen the edges.
Can I use acrylic paint for French tips?
Yes—many people love it for practice because it’s easy to clean up. Just seal with a good top coat.
Why do my French tips look jagged?
Usually too much product on the brush. Wipe one side off and build in thin layers.
And if your nails feel dry afterward, don’t worry—my gel removal guide also includes aftercare to help nails feel glossy and flexible again.
Final thought
French tips don’t have to be a “good hand vs. bad hand” situation. Once you’ve got the right brush trio—liner for the smile line, angled for symmetry, and a clean-up brush for crisp edges—the whole look gets easier, faster, and way more polished. If you’re building your kit, start with a 7–12mm liner brush, add the angled brush when you want that perfectly balanced curve, and keep a clean-up brush nearby for the kind of sharp finish that looks genuinely salon-done.
If you want to upgrade beyond French tips, my roundup of professional nail art brushes breaks down the best sets for clean lines, details, and everyday at-home manicures.
Leave a Reply