Nail art brushes are a little like white sneakers.
They look perfect on day one. Then one “quick” manicure later… your liner brush is stiff, the tip is frayed, and suddenly your French smile line looks more like a wavy road than a clean curve.
If that’s happening, it’s not because you bought the “wrong” brush. It’s because most of us clean brushes the way we hope works—soak, scrub, or swipe aggressively—when the real secret is gentler (and faster).
In this guide, I’ll show you exactly how to clean nail art brushes after use—whether you’re working with regular polish, gel, or acrylic paint—so your bristles stay pointed, your lines stay crisp, and your brushes don’t die after three manicures.
Bonus: I’ll also cover what to use instead of acetone, the common mistakes that cause fraying, and how to store brushes so they keep that “new brush” shape.
In This Article
- TL;DR
- What you should use to clean nail art brushes
- How to clean nail art brushes after use (the 60-second routine)
- How to clean gel nail art brushes (without fraying them)
- How to get acrylic off a nail brush (and save a stiff brush)
- How to clean nail art brushes without acetone
- Common brush cleaning mistakes that ruin your brushes
- How to store nail art brushes so they stay pointed
- FAQs
- Final thought
TL;DR
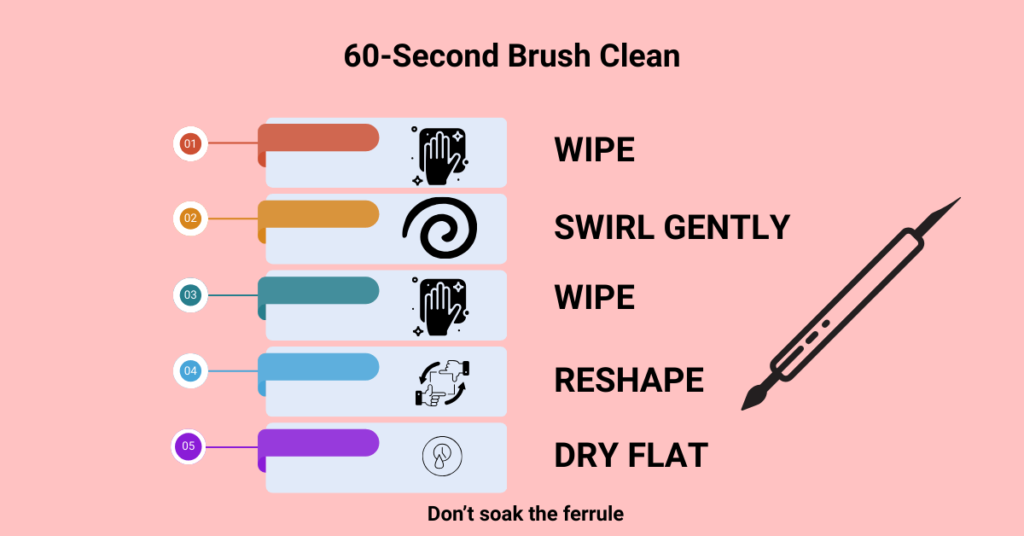
Quick answer: Clean nail art brushes in 60 seconds by wiping off excess product, gently swirling the bristles in the right cleanser for what you used, then wiping until clean, reshaping the tip, and drying the brush flat. Don’t soak the ferrule, don’t use hot water, and don’t smash the bristles—those three things are what make brushes fray fast.
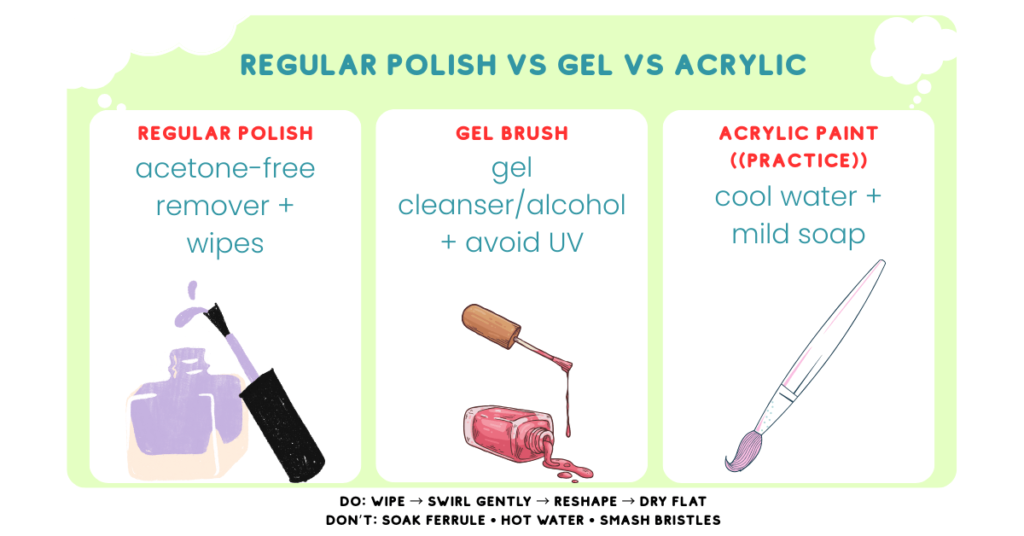
- After regular polish: Wipe first → a little remover/cleanser on a lint-free pad → wipe clean → reshape → dry flat.
- After gel: Clean before curing → gently wipe with gel cleanser/alcohol (as appropriate) → reshape the point → keep away from UV/light → dry flat.
- After acrylic paint: Rinse quickly with cool water + mild soap → wipe → reshape → dry flat (don’t let paint dry in the bristles).
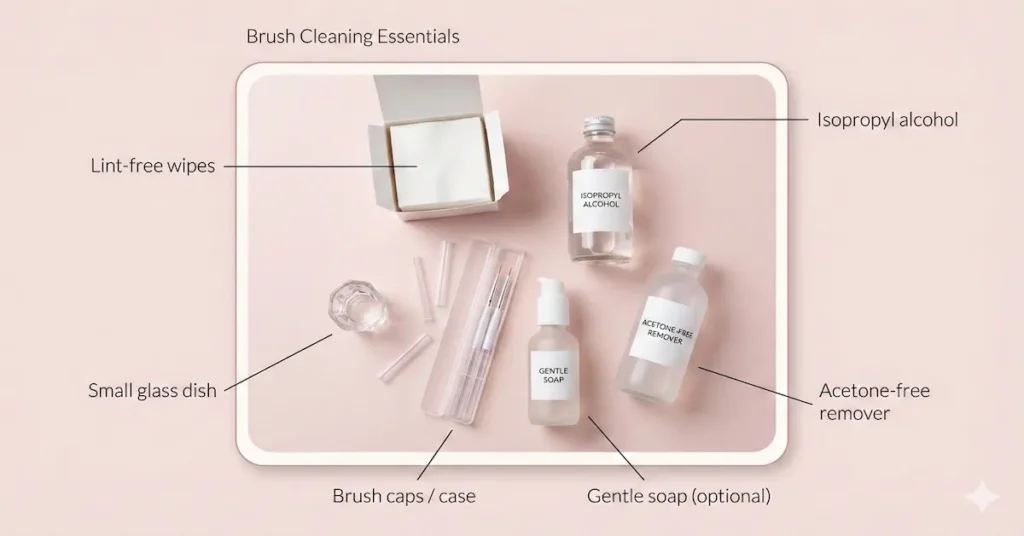
Shop essentials: lint-free wipes + isopropyl alcohol + a small dish/cleaning jar + brush caps/case
What you should use to clean nail art brushes
The right cleaner depends on what you used on the brush. The goal is simple: remove product without drying out or splaying the bristles. Here’s what works best.
For regular nail polish
- Lint-free wipes (so fibers don’t get stuck in the brush)
- Gentle polish remover (acetone-free is safer for frequent cleaning)
- Small glass dish or dappen dish (so you’re not soaking the whole brush)
Shop it now on Amazon: lint-free wipes • acetone-free remover • small glass dappen dish
For gel nail art
Gel is the one that “kills” brushes the fastest because it hardens. The trick is cleaning before curing and keeping your brush away from UV/light while you work.
- Isopropyl alcohol (70% or 91%) for wiping/residue cleanup
- Gel brush cleaner (optional but great if you use gel often)
- Lint-free wipes (again—non-negotiable)
Shop it now on Amazon: isopropyl alcohol • gel brush cleaner • lint-free wipes
For acrylic paint (practice tips)
Acrylic paint is beginner-friendly for practicing French tips because it’s easy to clean—as long as you don’t let it dry in the brush.
- Cool water (hot water can loosen glue inside the ferrule)
- Mild soap or gentle brush soap
- Lint-free towel to blot + reshape
Shop it now on Amazon: gentle brush soap • lint-free towels
What to avoid (this is what ruins brushes)
- Soaking the ferrule (liquid creeps inside → loosens glue → shedding/fraying)
- Hot water (warps bristles and weakens the ferrule glue)
- Scrubbing or smashing the brush tip on a pad (splays the point)
- Drying upright while wet (water runs into the ferrule and damages the brush over time)
How to clean nail art brushes after use (the 60-second routine)
This is the routine that keeps your brushes looking new. It’s quick, gentle, and it prevents the two biggest problems: stiff bristles and a frayed tip.
What you need: lint-free wipes + a small dish + the right cleanser for what you used (remover for polish, alcohol/gel cleanser for gel, soap + cool water for acrylic paint).
Step 1: Wipe off excess product first
Before you touch any liquid, gently pinch/wipe the bristles on a lint-free wipe to remove the bulk of product. This prevents you from pushing pigment deeper into the brush.
Step 2: Swirl gently (don’t smash the bristles)
Pour a tiny amount of cleanser into a small dish. Then swirl the bristles lightly in the liquid—just the hairs, not the metal ferrule. Think: soft dance, not scrubbing.
Pro tip: Keep the brush angled downward so liquid doesn’t creep up into the ferrule.
Step 3: Wipe, then repeat until the wipe stays clean
Swipe the brush on a fresh lint-free wipe. If you still see color/product, do a quick swirl again and wipe again. Stop as soon as the wipe comes away clean—over-cleaning can dry bristles out.
Step 4: Reshape the point (this is what keeps it “liner sharp”)
Use your fingers to gently shape the bristles back into their original form—especially for liner brushes. A quick pinch + twist is often enough to bring the tip back to a clean point.
If your brush is a little splayed: shape it into a point, then let it dry with a brush cap (or a loose piece of plastic wrap) so it “sets” in place.
Step 5: Dry flat (not upright)
Lay the brush flat on a clean towel and let it dry completely. Drying upright while wet can let liquid run into the ferrule over time, which is how brushes start shedding or fraying.
Optional “keep it perfect” step: Once fully dry, store it with a cap or in a slim brush case so the bristles don’t get crushed in a drawer.
Shop essentials: lint-free wipes • small glass dish • brush caps / brush case
How to clean gel nail art brushes (without fraying them)
Gel is the #1 reason nail art brushes “randomly” die. Not because gel is evil—because it cures fast and leaves residue right where you don’t want it: near the base of the bristles.
Rule #1: Clean your brush before curing. Gel gives you time to perfect—but only if you wipe it off before it hardens.
Gel brush cleaning steps

- Wipe first: Pinch the bristles gently in a lint-free wipe to remove excess gel.
- Cleanser next: Add a small amount of gel cleanser (or isopropyl alcohol if that’s what you use) to a dish and swirl only the hairs.
- Wipe until clean: Repeat wipe → swirl → wipe until the wipe stays clear.
- Reshape the point: Pinch/twist lightly back into a sharp tip.
- Keep it away from UV: Don’t park gel brushes near a window or curing lamp—stray UV can harden residue.
Shop it now on Amazon: gel brush cleaner • isopropyl alcohol • lint-free wipes
Internal link tip: If you’re cleaning brushes because your French tips keep going wobbly, link this sentence to your tutorial: best nail art brush for French tips.
How to get acrylic off a nail brush (and save a stiff brush)
If acrylic dries in a brush, it can feel like a lost cause. Sometimes it is. But if you catch it early (or soften it carefully), you can often rescue the shape.
If the acrylic is still wet
- Wipe excess immediately on a lint-free wipe.
- Swirl the bristles in a small dish of the appropriate liquid (use only enough to loosen product).
- Wipe clean, reshape, and dry flat.
If the acrylic has dried
Go slow here. Aggressive scraping is how bristles snap and permanently fray.
- Soften gradually in a small dish (avoid soaking up to the ferrule).
- Wipe and gently comb through with a lint-free wipe—no pulling.
- Reshape the point and let it dry with a cap if you have one.
When to retire it: If bristles are permanently bent, the point won’t return, or it sheds hairs into polish, it’s time. Keeping a “practice brush” is still worth it.
How to clean nail art brushes without acetone
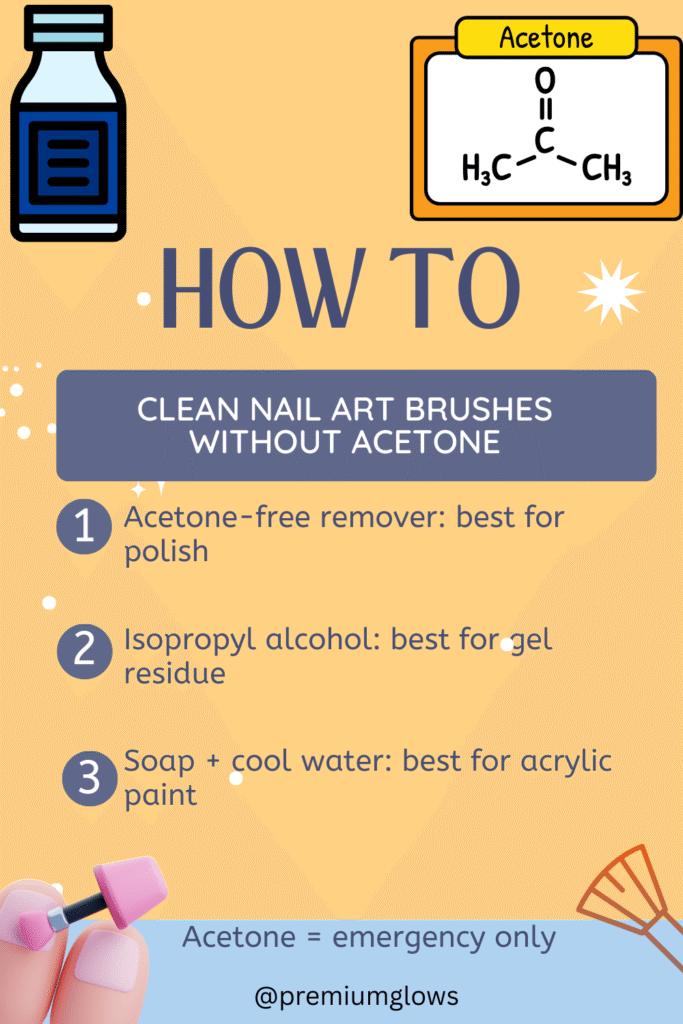
If you’re cleaning brushes often, acetone can dry out bristles faster. You can usually keep acetone as an “emergency option” and use gentler choices day-to-day.
- Acetone-free remover: Best for regular polish cleanup without over-drying.
- Isopropyl alcohol: Great for gel residue/wiping (use as needed, don’t soak).
- Mild soap + cool water: Best for acrylic paint (practice), not for gel.
When acetone is useful: If your brush has stubborn regular polish buildup that won’t lift, use acetone briefly—then wipe clean and reshape immediately. Think “quick swipe,” not “long soak.”
Shop it now on Amazon: acetone-free remover • isopropyl alcohol
Common brush cleaning mistakes that ruin your brushes
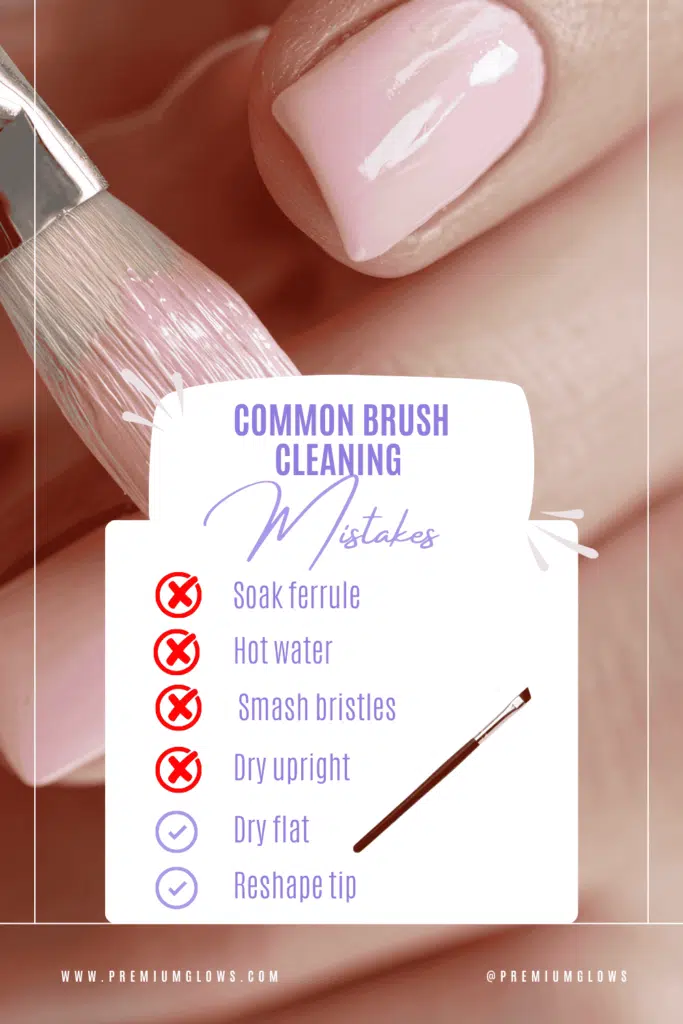
- Soaking the ferrule: Liquid loosens the glue inside → shedding + fraying.
- Hot water: Warps bristles and weakens the ferrule bond over time.
- Smashing bristles on a pad: This “fans out” liner brushes and kills precision.
- Cleaning too aggressively: You don’t need force—just repeat gentle wipes.
- Drying upright while wet: Moisture runs into the ferrule and causes damage.
Doing nail art at home? Pair clean brushes with healthy nails—here’s a gentle, salon-style tutorial on how to remove gel nail polish at home safely so your nail surface stays smooth (and your designs look cleaner).
How to store nail art brushes so they stay pointed
The right storage is what keeps your liner brush looking sharp instead of fuzzy. The goal: no crushing, no moisture in the ferrule, and no random drawer chaos.
- Dry flat first, always. Once fully dry, store.
- Use brush caps (especially for liner/detail brushes) to protect the tip.
- Store horizontally in a slim case or tray so bristles aren’t bent.
- Travel tip: Use a hard case so your brush tips don’t get crushed in a makeup bag.
Shop it now on Amazon: brush caps • brush storage case
Internal link tip: If you’re building a full kit, link this sentence to your pillar: best professional nail art brushes.
FAQs
How do you clean nail art brushes after using gel?
Wipe off gel immediately (before curing), then gently clean with gel cleanser or isopropyl alcohol, wipe until clear, reshape the tip, and dry flat.
Can I use acetone to clean nail art brushes?
Yes, but use it sparingly. A quick swipe can remove stubborn polish, but soaking can dry bristles and loosen glue inside the ferrule over time.
How do you clean nail art brushes without acetone?
Use acetone-free remover for regular polish, isopropyl alcohol for gel residue, and mild soap + cool water for acrylic paint practice.
How do you wash nail art brushes with soap and water?
Use cool water and mild soap, swirl gently, rinse quickly, reshape the bristles, and dry flat. Avoid hot water and avoid soaking the ferrule.
Why are my nail art brushes fraying after cleaning?
Usually from soaking the ferrule, scrubbing too hard, or drying upright while wet. Gentle wipes, reshaping the point, and drying flat prevent fraying.
How do you keep a liner brush pointed?
Wipe gently (don’t smash), reshape the tip after cleaning, let it dry flat, and store it with a brush cap or in a case.
How do you remove dried acrylic from a brush?
Try softening it gradually and wiping gently—avoid scraping or pulling bristles. If the brush stays stiff or won’t hold a point, keep it as a practice brush and replace it for detail work.
How often should you deep clean nail art brushes?
Do the quick clean after every use. Deep clean whenever you notice residue, stiffness, or the brush won’t hold a clean point—especially after gel or heavy pigment.
Final thought
A good nail brush doesn’t suddenly “go bad”—it usually gets ruined by tiny habits: soaking too high, scrubbing too hard, or drying it upright. Stick to the gentle 60-second routine (wipe → swirl → wipe → reshape → dry flat), and your brushes stay pointed, your lines stay crisp, and your manicures look cleaner with less effort. If you’re building your kit, don’t miss my guide to best professional nail art brushes—and if French tips are your goal, this French tip brush guide will make your smile line so much easier.
Leave a Reply