Gel nails are the beauty equivalent of a crisp blowout: when they’re done right, everything looks instantly more polished. But “gel” can also be confusing—between true gel vs gel-effect, lamp types, and the dreaded day-3 peeling.
This guide is your 2026 editor-approved shortcut to the gel polishes (and kits) that deliver that clean, glossy, expensive-looking finish at home—plus the simple prep + removal habits that keep your natural nails strong underneath.
Before You Buy: The 60-Second Gel Nail Polish Checklist
- Do you have a UV/LED lamp? True gel needs curing. (If not, look for gel-effect polish.)
- Base + top coat matter more than the color. They’re the “glue + glass” of long wear.
- Thin coats win. Thick gel can wrinkle, lift, or cure unevenly.
- Keep gel off skin. Flooded cuticles = lifting (and messy edges).
- Plan removal before you paint. Soak-off > peeling for healthier nails.
Want a damage-free way to take gel off? Follow my step-by-step guide: how to remove gel nail polish at home safely.
Who This Guide Is For
If you’ve ever said, “I just want my nails to look clean and glossy for more than three days,” you’re in the right place. This roundup is made for:
- Beginners who want an easy kit (lamp + base/top included)
- Minimalists who want one signature nude that always looks elegant
- Busy girls who want long wear without the “thick, bulky gel” look
- Nail-care people who care just as much about removal as the shine
- Sensitive or ingredient-cautious readers who prefer gentler options (like formulas labeled HEMA-free or TPO-free) and want to keep gel off skin for a cleaner, lower-irritation routine
If you’re ready to upgrade your results, these are my favorite best professional nail art brushes for cleaner lines and smoother gel application.
Quick note: Even “gentler” formulas can still irritate some people—so if you’re sensitive, patch test, cure fully, and avoid getting gel on your cuticles and skin.
Quick Picks: Best Gel Nail Polish (By Need)
Looking for the best gel nail polish for at-home manicures? Below are my editor-style quick picks by need (beginners, long-lasting wear, nudes, reds, and salon-level brands) — plus removal tips so your nails stay healthy.
| Product | Best For | Type | Bottle Size | Lamp Needed | Rating |
|---|---|---|---|---|---|
| Beetles Gel Nail Polish Kit (55 Colors) | Beginners / All-in-one kit | Color gel + kit | 5ml minis | Yes (included) | ★★★★☆ 4.3 |
| Beetles Base + No-Wipe Top Coat | Long-lasting manicures | Base + top | 15ml each | Yes | ★★★★☆ 4.6 |
| AILLSA Milky Pink Builder Gel | Brittle / bendy nails | Builder gel | 15ml | Yes | ★★★★☆ 4.2 |
| GAOY Glassy Base + Top Coat | High-shine, no-chip wear | Base + top | 16ml total | Yes | ★★★★★ 4.5 |
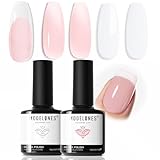
| Modelones French Manicure Set | Nude / French tips | Color gel | 15ml | Yes | ★★★★☆ |
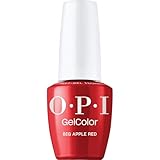
| OPI GelColor | Salon-quality wear | Professional gel | 15ml | Yes | ★★★★★ |
Quick tip: If your gel manicure chips early, upgrading your base + top coat often makes a bigger difference than switching color brands.
Best Gel Nail Polish for Beginners
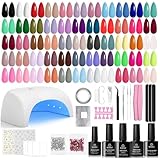
Beetles Gel Nail Polish Kit with UV Light (80pcs, 55 Colors) — Best Beginner Starter Kit
What you’re getting: 55 gel colors (5ml each) + UV light + base coat + top coat + manicure tools/stickers.
If you want a one-box gel setup that feels like a mini salon drawer, this Beetles kit is the easiest way to start. The big win here is the balance of variety + convenience: you’re not buying “just colors” and then realizing you still need a lamp, base/top, and the little tools that make gel look neat (like stickers for quick designs and basic manicure pieces for prep).
Why it’s worth including in your “Best Gel Nail Polish” list
- Massive shade wardrobe (55 colors): Great for beginners because you can experiment with nudes, reds, and playful shades without committing to full-size bottles.
- Glossy finish: When gel looks good, it’s usually because your top coat lays down smooth and shiny—this kit is meant to deliver that classic glossy gel look.
- Chip-resistant + long-wearing promise: In practice, long wear comes from prep + thin coats + full curing. This kit gives you the essentials; your technique makes it last.
- Giftable + beginner-friendly: It’s one of the best formats for teens/college, first-time gel users, or anyone who wants “everything in one box.”
Texture & performance notes (what to expect)
Because the bottles are 5ml mini sizes, think of them as “try-on shades” rather than forever bottles. Minis are perfect for testing colors and rotating manicures often.
For application, kits like this usually work best when you:
- apply very thin coats (gel wrinkles if it’s thick)
- cure properly under the lamp
- use 2 thin color coats for an even, opaque look (especially with lighter shades)
- cap the free edge (paint a tiny bit over the tip) to reduce chipping
Who this kit is best for
✅ Beginners who want the easiest path to at-home gel
✅ Anyone who loves switching colors often (55 shades = you’ll never get bored)
✅ People who want a single purchase instead of building a kit piece-by-piece
✅ Content creators/Pinterest users who need lots of shades for photos
Who should skip it
❌ If you only wear one signature nude and want a premium formula in a larger bottle
❌ If you prefer full-size bottles (5ml minis run out faster)
❌ If you want to keep your collection minimal and curated
Pro tip to make this kit last longer (and feel more “salon”)
Add a short “prep checklist” right below your kit section:
- Push back cuticles
- Lightly buff shine (don’t over-buff)
- Clean nails with alcohol/lint-free wipe
- Base coat thin + cure fully
- Two color coats (thin) + cure each
- Top coat + cure, then cap edges
As an Amazon Associate, PremiumGlows may earn from qualifying purchases — at no extra cost to you.
Best Long-Lasting Gel Manicure Essentials (Base + Top Coat)
Beetles Base + No-Wipe Top Coat Set (2pcs, 0.51 fl oz each) — Best Budget “Chip-Resistant” Longevity Duo
ASIN: B07F12SZDS
What you’re getting: 2-piece set (gel base coat + glossy gel top coat), 1.02 fl oz total (0.51 fl oz each), soak-off, UV/LED curing required.
If your gel manicure looks flawless on day one but starts to peel near the cuticle or wear down at the tips, the fix is rarely “more color coats.” It’s your foundation. This Beetles base + top coat duo is a smart, budget-friendly way to upgrade wear time because it strengthens the two layers that actually decide longevity: the grip (base) and the seal (top).
Why it deserves a spot in your “Best Gel Nail Polish” article
- Chip-resistant focus: Great for readers who type a lot, wash hands often, or see tip wear by day 3–4.
- Budget-friendly longevity upgrade: A solid base/top set can make even affordable gel colors look more “salon.”
- Glossy finish: That smooth, reflective top coat is what makes nails look freshly done longer.
- Good value size: Full-size bottles (0.51 fl oz each) last through many manicures.
Texture & performance notes (what to expect)
- Base coat: Works best in a paper-thin layer. Too thick can cause lifting because gel may not cure evenly.
- Top coat: Apply evenly, then cap the free edge for better tip wear. A glossy top coat is what gives that “gel glass” look.
Who this is best for
✅ DIY gel users whose manicures peel early or chip at the tips
✅ Beginners who want a simple base + shine system without extra steps
✅ Anyone using gel color kits who wants a more “salon-finished” result
✅ Minimalists who’d rather upgrade essentials than buy more shades
Who should skip it
❌ If you don’t have a UV/LED lamp (curing is required)
❌ If you only use regular nail polish (not gel)
❌ If you frequently flood cuticles—technique matters as much as product for long wear
Pro tips for a longer-lasting gel manicure
- Push back cuticles + lightly buff shine (don’t over-buff)
- Wipe nails with alcohol to remove oils before base coat
- Apply base coat thin and keep it off skin (tiny gap at cuticle)
- Cap the free edge with both base + top coat
- Cure fully (under-curing = peeling)

As an Amazon Associate, PremiumGlows may earn from qualifying purchases — at no extra cost to you.
Best Gel Polish for Brittle Nails
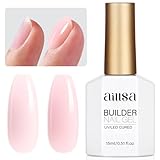
AILLSA Milky Pink Builder Gel (7-in-1, 0.51 oz) — Best for Brittle Nails + Natural “Milky Pink” Manicures
What you’re getting: 7-in-1 builder gel / hard gel-style strengthener in a milky nude pink, meant for thickening/overlay and short extensions; UV lamp curing required; base coat needed.
If your nails are thin, bendy, or constantly peeling, a milky builder gel like this can be a game-changer—because it’s not just color. It creates a soft-structure overlay that makes nails feel stronger and look smoother, with that “healthy, milky pink” finish that’s perfect for clean French manicures or minimalist nails.
Why it belongs in “best gel polish for Brittle Nails”
- Strength + structure: Builder gel is made to reinforce the nail so it doesn’t flex and crack as easily.
- Milky pink shade: The color is flattering and forgiving—great for disguising ridges and uneven tone.
- 7-in-1 positioning: These all-in-one builder gels are popular for DIY because they can work as an overlay, a light extension gel, and a smoothing base for polish.
Texture & performance notes (what to expect)
Builder gels are typically thicker than regular gel polish. That’s the point—it needs body to build structure.
For the smoothest, most natural result:
- Work in thin-to-medium layers (don’t dump on a thick blob)
- Let it self-level for a few seconds before curing (this helps avoid lumps)
- Cure fully (under-curing can cause lifting or soft spots)
Who this is best for
✅ Brittle, bendy, peeling nails that need reinforcement
✅ Anyone who wants a clean, milky nude look with a glossy finish
✅ DIY users who want short extensions or an overlay (without acrylic)
✅ French manicure lovers who want a soft, natural base
Who should skip it
❌ If you only want quick color (builder takes a bit more technique)
❌ If you don’t have a nail lamp
❌ If you hate thicker products or want a super-fast 2-coat manicure
Pro tips (to make it look salon-smooth)
- Apply a base coat first (especially important for builder gels)
- Use a thin slip layer, then add a slightly thicker bead to build structure
- Flip your hand upside down for a few seconds (helps create a gentle apex on longer nails)
- Finish with a no-wipe top coat for the glossiest look
Best for: natural-looking milky-pink extensions + overlay thickening for a clean French manicure base.
As an Amazon Associate, PremiumGlows may earn from qualifying purchases — at no extra cost to you.
GAOY Glassy Base + No-Wipe Top Coat Set (2pcs, 16ml) — Best Long-Lasting “Glassy Finish” Essentials
ASIN: B0BD4MMFVM
What you’re getting: 1 base coat + 1 no-wipe top coat, 16ml total, UV cure, glossy “glassy” finish, long-wearing.
If your gel looks pretty but doesn’t stay pretty, this GAOY duo is the kind of upgrade that makes a real difference. A reliable base coat helps gel grip the nail (so it doesn’t peel at the cuticle), and a no-wipe top coat locks in color with that smooth, reflective shine that makes nails look freshly done for days.
Why it’s a strong pick
- Long-wearing focus: This set is built for wear time—exactly what most at-home gel users struggle with.
- No-wipe glossy finish: No-wipe top coats simplify your routine and usually leave a cleaner “glass” look without extra wiping steps.
- Solid social proof: Your screenshot shows 4.5★ with 10,641 ratings, which is a great sign for a staple product like base/top.
- Good bottle size: 16ml total gives you enough product to use consistently without running out after a few manicures.
Texture & performance notes (what to expect)
- Base coat: Apply in a thin, even layer. Too thick can cause lifting because gel may not cure evenly.
- Top coat: A good no-wipe top coat should cure smooth and glossy, not sticky. It also helps prevent micro-chips at the edges.
Who this is best for
✅ Anyone whose gel chips at the tips or peels at the cuticle
✅ People using budget gel color sets who want their manicure to look more “salon”
✅ DIY gel users who want a simple, two-step longevity upgrade
✅ Anyone who loves a high-shine, glassy finish
Who should skip it
❌ If you don’t have a UV/LED lamp (needs curing)
❌ If you only use regular nail polish (not gel)
❌ If your main issue is messy application—this won’t fix flooded cuticles (technique will)
Pro tips for maximum wear (tiny details that matter)
- Push back cuticles + lightly buff shine
- Wipe nails with alcohol before base coat
- Keep product off the skin (leave a hairline gap at the cuticle)
- Cap the free edge with both base + top coat
- Cure fully (under-curing = early peeling)

Best for: a glassy, high-shine gel finish with a smooth base layer that helps gel color look more even.
As an Amazon Associate, PremiumGlows may earn from qualifying purchases — at no extra cost to you.
Best Nude Gel Nail Polish
Modelones French Manicure Gel Polish Set (2pcs, 15ml) — Best Nude Gel for Classic French Tips
ASIN: B0D3V8CSKR
What you’re getting: 2 gel polishes (15ml each) in a classic French manicure combo (white + nude/pink jelly-sheer), soak-off, UV/LED.
If your goal is that clean, polished “French tip” look—soft nude base, crisp white edge—this Modelones duo is a smart pick because it keeps things simple: you get the two shades you actually need, in full-size 15ml bottles (not tiny minis). It’s the kind of set you’ll reach for again and again when you want nails to look neat, natural, and expensive.
Why it earned a spot in “Best Nude Gel Nail Polish”
- French manicure-ready shades: The whole point is the nude/pink base that looks like “your nails, but better,” paired with a classic white.
- Jelly/sheery base = more forgiving: Sheer nudes are easier to blend and build—so if you’re not a pro, it still looks smooth and natural instead of thick or chalky.
- 15ml bottles: Larger bottles mean better value over time—especially if French tips are your signature.
- Glossy finish: With a good top coat, this type of nude base can look very “salon clean.”
Texture & performance notes (what to expect)
This set is designed to create a natural, layered look, not a heavy opaque base. For the most flattering finish:
- Apply the nude/pink in thin layers (usually 2 coats is the sweet spot for that milky, healthy look).
- The white is typically best in thin coats too—French tips look crisp when the edge isn’t bulky.
Because it’s soak-off gel, removal should be straightforward as long as you don’t peel. (Peeling is what causes that rough, flaky nail surface.)
Who this set is best for
✅ French tip lovers (the “always looks put-together” manicure)
✅ Anyone who wants a neutral nude that works with every outfit
✅ DIY gel users who prefer curated sets over huge color bundles
✅ People who want full-size bottles they’ll actually finish
For cleaner, crisp “smile lines,” use the right tool—here’s my guide to the best brush for French tips.
Who should skip it
❌ If you want a big color wardrobe (this is a focused 2-piece set)
❌ If you don’t already have base coat + top coat + lamp (this set includes only the two colors)
❌ If you prefer bold shades like reds, berries, or neons
Pro tips for a flawless French (tiny details that make it look “salon”)
- Do 2 thin coats of the nude/pink base for that smooth, blurred look.
- For the white tip, use a thin coat and build only where needed.
- Cap the free edge (seal the tip) before top coat to help prevent chipping.
- If you’re doing super crisp lines, link to your brush post nearby: a liner brush makes French tips look cleaner.
If you want ultra-thin, salon-sharp edges, a nail art liner brush makes the biggest difference.
Best for: classic French tips and a “your-nails-but-better” jelly nude base with salon-clean shine.
As an Amazon Associate, PremiumGlows may earn from qualifying purchases — at no extra cost to you.
Best Red Gel Nail Polish
OPI GelColor “Big Apple Red” (0.5 fl oz) — Best Red Gel Nail Polish for a Classic, High-Impact Manicure
ASIN: B0DCD7R41T
Shade: Big Apple Red (opaque bright red)
Finish: crème (no shimmer—just that clean, lacquer-like red)
Standout notes: LED cure, salon-quality shine, soak-off removal, vegan, HEMA-free + TPO-free, “self-corrects” application.
If you’re picking just one red for your gel wardrobe, this is the kind of shade you choose: bright, classic, and unmistakably polished. Big Apple Red is that confident, crisp red that makes nails look instantly more “done”—even if your outfit is a simple white tee and messy bun situation.
Why it earned “Best Red Gel Nail Polish”
- True classic red (not too blue, not too orange): It reads flattering and timeless in photos and real life.
- Crème finish = the most editorial-looking red: No sparkle, no distraction—just a clean, glossy statement.
- Salon-level reputation: OPI’s GelColor line is built for that smooth, professional finish.
- Sensitive-skin friendly angle (for many users): The listing states HEMA-free + TPO-free, which is a strong trust signal for readers who get irritation from some gels. (Still patch test—everyone’s different.)
Texture & performance notes (what to expect)
- Reds tend to show mistakes (streaks, flooding) more than nudes, so the best reds apply evenly and look opaque in two thin coats.
- The “self-correcting” claim usually points to a formula that levels nicely, helping the surface look smoother once cured.
Best results:
- 1 thin coat → cure
- 2nd thin coat → cure
- top coat → cure
- cap the free edge (especially with reds, which can chip visibly)
Who this red is best for
✅ Anyone who wants a signature red that always looks expensive
✅ Special occasions (weddings, holidays, date night) and everyday confidence nails
✅ People who prefer opaque color (not sheer/jelly)
✅ Readers looking for HEMA-free/TPO-free options
Who should skip it
❌ If you prefer jelly reds or shimmer/glitter finishes
❌ If you want a budget mega-set (this is a premium single shade)
Pro tip: keep red looking crisp (no staining, no rough removal)
- Use a good base coat (prevents stains and improves wear)
- Remove gently (don’t peel—reds make damage more noticeable)
Best for: a salon-glossy classic red set with smooth self-leveling shine—great when you want “expensive-looking” color that soaks off cleanly.
As an Amazon Associate, PremiumGlows may earn from qualifying purchases — at no extra cost to you.
Best Budget Gel Nail Polish Set
JODSONE 36 PCS Gel Nail Polish Set (32 Colors + Base + Glossy/Matte/Glitter Tops) — Best Budget Gel Set for Variety
ASIN: B09KC56289
What you’re getting: 32 gel colors (5ml) + base coat + glossy top coat + matte top coat + glitter top coat (36 pieces total). UV/LED lamp needed.
If you love having options—nudes, brights, reds, blues, greens, pinks—this JODSONE kit is the classic “big color wardrobe” buy. It’s built for DIY users who want variety without buying individual bottles, and the inclusion of multiple top coats (glossy + matte + glitter) makes it easy to change the vibe of the same shade without redoing your whole manicure.
Why it’s worth including in your “Best Gel Nail Polish” list
- Huge shade range: 32 colors gives you year-round flexibility (everyday neutrals + fun seasonal shades).
- Multiple finishes included: Glossy for classic shine, matte for trendy velvet nails, glitter for accent nails and party looks.
- Base coat included: Helpful for beginners because it covers a key step that affects wear time.
- Long-wearing potential: With proper prep and thin coats, big kits like this can perform surprisingly well.
Texture & performance notes (what to expect)
Because the colors are 5ml mini bottles, think of them as:
- perfect for testing lots of shades
- great for seasonal looks and nail art
- not ideal if you always wear the same one color weekly (you’ll finish that shade fastest)
For the best results:
- do thin coats (especially with darker shades)
- cure each layer fully
- cap the free edge to reduce tip wear
Who this kit is best for
✅ Budget shoppers who want the most shades in one buy
✅ DIY users who like switching colors often
✅ Anyone who wants matte + glitter options without buying separate top coats
✅ Pinterest/IG creators who need lots of color variety for content
Who should skip it
❌ If you want premium, pro-level formula consistency
❌ If you only wear one or two signature shades
❌ If you don’t have a UV/LED lamp yet (you’ll need one)
Pro tip (how to get “salon-looking” results from a big budget kit)
Use your best top coat choice for the finish you want:
- glossy top for the most “salon clean” look
- matte top for modern, soft-focus nails
- glitter top as an accent on ring fingers or over French tips

Best for: building a full at-home gel wardrobe—brights, neutrals, and finishes (glossy, matte, glitter) in one kit.
As an Amazon Associate, PremiumGlows may earn from qualifying purchases — at no extra cost to you.
Best Salon-Level Gel Nail Polish Brand
Gelish MINI Gel Nail Polish (9mL) — Best Salon-Level Gel Polish for High-Shine, Chip-Resistant Wear
ASIN: B08628RLKD
Shade: Creme De La Femme (crème finish)
Size: 9mL (0.3 fl oz)
Standout notes: professional quality, soak-off, high shine, chip-resistant, long-wearing, TPO-free.
If you want your gel manicure to look clean, glossy, and truly salon-finished, Gelish is the kind of brand that instantly raises the “credibility” level of your whole roundup. The formula is designed for that polished, smooth surface that makes nails look freshly done—especially in crème shades like this, where the finish is all about even coverage and shine.
Why Gelish earns “Salon-Level” status
- Professional-quality reputation: Gelish is widely associated with salon systems and consistent wear.
- Crème finish = the most editorial look: No shimmer to hide bumps—when it looks good, it looks really good.
- Chip-resistant + long-wearing focus: This is the kind of gel people choose when they want their manicure to last through real life.
- Soak-off removal: Important for home users who want a pro look without harsh scraping.
Texture & performance notes (what to expect)
- Crème gels typically look best in two thin coats for full, even color.
- The “pro” feel usually comes from a formula that levels smoothly and cures with a glossy, glass-like finish once top-coated.
For the neatest results:
- keep coats thin (thick layers can wrinkle)
- leave a tiny gap near the cuticle (prevents lifting)
- cap the free edge to protect the tips
Who this shade is best for
✅ Anyone who wants a salon-level finish at home
✅ People who prefer classic crème color (no shimmer, no glitter)
✅ Readers building a curated, higher-quality collection (fewer bottles, better payoff)
✅ Anyone who wants long wear without that “thick, bulky gel” look
Who should skip it
❌ If you want a big budget set with dozens of colors (this is a premium single shade)
❌ If you prefer sheer/jelly finishes over crème opacity
❌ If you want the cheapest option possible
Pro tip: make it last like a salon manicure
Pair it with a solid base + no-wipe top coat (your Makartt/GAOY picks are perfect here). Gelish looks its best when the foundation and seal are strong.

Best for: trying pro-quality gel in a mini size—ideal for testing shades or building a curated “capsule” gel collection.
As an Amazon Associate, PremiumGlows may earn from qualifying purchases — at no extra cost to you.
What Counts as “Real” Gel Nail Polish?
In nail-land, “gel” gets used for two totally different things—and that’s where a lot of disappointment (and peeling) starts. True gel nail polish is a resin-based formula that must be cured under a UV/LED lamp to harden. When it’s done right, it looks ultra-glossy, feels smooth, and can wear like a tiny suit of armor on your nails.
Gel-effect (sometimes called “gel-like” polish) is basically high-shine regular polish. It’s designed to mimic the plump, glossy finish of gel without a lamp. It’s amazing if you want easier removal and less commitment—but the wear time usually won’t match true gel (especially if you wash hands often or your nails bend easily).
True Gel (Needs a UV/LED Lamp)
Choose true gel if you want that salon-clean shine, longer wear, and a finish that doesn’t smudge. Just remember: removal matters. True gel should be soaked off (not peeled), and your wear time depends heavily on prep + thin coats + full curing.
Gel-Effect Polish (No Lamp Needed)
Choose gel-effect if you want a glossy, “done” look but prefer a simpler routine. It dries like regular polish, removes with regular remover, and is great for people who like to change shades often—or don’t want to invest in a lamp. Think of it as high-shine polish with a gel vibe, not a true gel system.
Why It Matters for Wear Time + Removal
If you buy a true gel shade but skip the lamp, it won’t fully cure—so it can stay soft, wrinkle, or lift fast. And if you treat true gel like regular polish and try to wipe it off, you’ll end up scrubbing too hard. Matching the product type to the right routine is the secret to nails that stay glossy and healthy.
| Feature | True Gel (Lamp Cure) | Gel-Effect (No Lamp) |
|---|---|---|
| Needs UV/LED lamp? | Yes | No |
| Finish | Glassy, “salon” shine | Glossy, gel-like shine |
| Wear time (typical) | 7–14+ days (with good prep) | 3–10 days (depends on formula + nails) |
| Removal | Soak-off (acetone + wraps) — don’t peel | Removes like regular polish |
| Best for | Long wear, low-smudge, pro finish | Easy swaps, lower commitment |
How We Chose the Best Gel Nail Polish Brands
I built this list the same way I’d build a gel wardrobe for a friend: a few wear-everywhere shades, a couple of beginner-friendly kits, and the unsexy essentials (base + top coat) that actually determine whether your manicure looks salon-fresh on day 10—or starts peeling on day 3.
- Wear time: Brands that can realistically last through typing, handwashing, and real life (when paired with good prep).
- Opacity + finish: Smooth coverage in thin coats—especially important for reds and crème shades that show every mistake.
- Curing consistency: Formulas that cure evenly under UV/LED without wrinkling (thick gel is the #1 culprit here).
- Brush control: A brush that makes neat application possible at home—because flooding your cuticles is basically an invitation for lifting.
- Value + bottle size: Full-size bottles for signature shades, mini sets when variety is the goal (and you’ll rotate colors).
- Beginner-friendliness: Kits and formulas that are forgiving—like jelly nudes, which hide streaks and look polished even when you’re learning.
- Sensitivity-friendly options: When available, I noted claims like HEMA-free or TPO-free for readers who prefer a gentler route. (Always patch test—everyone’s nails and skin react differently.)
- Availability on Amazon: Every pick was chosen with at-home shopping in mind, so you can actually find it without hunting through pro-only suppliers.
One more thing: I didn’t only focus on “pretty shades.” The brands that truly earn a spot are the ones that help your gel look smooth, glossy, and chip-resistant—without turning removal into a damage situation.
Best Gel Polish Brands (Detailed Reviews)
Quick picks are great—but if you’re building a gel wardrobe, brand matters. Some brands are better for sheer “clean” nails, some are best for opaque crème coverage, and some win purely because their kits make gel easy for beginners. Here are the gel brands I’d actually point a friend to, depending on what you want your manicure to do.
1) Beetles — Best Affordable, Beginner-Friendly Gel Brand
If you want gel that’s easy to find, budget-friendly, and beginner-proof, Beetles is the brand most at-home users start with—and keep repurchasing. They’re especially strong in jelly nudes (the “your nails but better” look) and starter kits.
- Best for: beginners, jelly nudes, kits, everyday wear
- Why it’s good: forgiving finishes + lots of shade variety
- Tip: longevity improves dramatically when you pair it with a solid base + no-wipe top coat and keep coats thin
2) GAOY — Best “Glassy” Finish for Long-Wear
GAOY shines when you care about how your gel looks on day 10. Their base + no-wipe top coat style products are popular because they give that smooth, reflective, salon-glass shine that makes even simple colors look expensive.
- Best for: long wear, glossy “glass nails,” upgrading cheaper gel colors
- Why it’s good: base/top performance = fewer chips and less peeling
- Tip: cap the free edge with base + top coat to prevent tip wear
3) Modelones — Best for Classic Neutrals + French Manicure Sets
Modelones is a great “put-together nails” brand: lots of wearable nudes, French sets, and soft neutral shades that photograph beautifully. If you love a clean base and crisp tips, this brand is an easy yes.
- Best for: French tips, neutral sets, clean minimal manicures
- Why it’s good: curated sets make choosing easy
- Tip: use a liner/french brush for cleaner smile lines
4) OPI GelColor — Best Premium “Classic Shade” Brand
OPI is the brand you reach for when you want a statement shade that looks editorial—especially true reds and timeless classics. The vibe is “polished adult manicure,”
Best At-Home Gel Nail Kit (Beginner Setup)
What You Actually Need (Simple Checklist)
If you’re starting gel at home, ignore the “50-step” TikTok routines. A long-wear gel manicure is mostly about three things: a reliable lamp, a good base/top system, and clean prep. Here’s the simple, no-drama checklist that covers everything you need for glossy, salon-looking nails.
Your beginner gel essentials:
- UV/LED lamp (true gel needs curing — LED is the easiest for home use)
- Base coat (the “grip” layer that prevents peeling)
- Top coat (the “glass” layer that keeps shine + seals edges)
- Gel color (start with 1–2 shades you’ll actually wear)
- Lint-free wipes + alcohol (to dehydrate nails and remove oils)
- Cuticle pusher (gel lifts faster when cuticle film stays on the nail plate)
Not sure which brush does what? Here’s my quick guide to nail art brush types (beginner-friendly + what each one is for).
- Nail file (180 grit) (for shaping + breaking the top-coat seal during removal)
- 100% acetone + foil/clips (because healthy removal is part of the plan, not an afterthought)
Quick sanity check: if your nails peel by day 3, it’s almost never the shade. It’s usually prep, base/top, or curing.
The Easiest Kit for First-Timers
If you want the easiest “open the box and start” setup, go for a kit that includes lamp + base/top + a curated set of colors. It removes decision fatigue and gives you the full system you need to actually get gel to stay.
What to Upgrade After Your First Few Manicures
Once you’ve done 2–4 manicures, you’ll notice something: the real “wow” doesn’t come from buying more colors. It comes from upgrading the parts that control wear time and shine.
Upgrade in this exact order (it gives the biggest results):
1) Base + top coat first (biggest performance upgrade)
This is the smartest “pro” move. A better base improves grip at the cuticle, and a better top coat keeps tips sealed and glossy.
From your list, this is where your GAOY / Makartt / Beetles base + top picks shine. This upgrade alone can make budget gels wear like a salon set.
2) Add one premium “signature shade”
After you’ve mastered thin coats, treat yourself to one shade that always looks expensive:
- A clean nude for everyday
- A classic red for instant polish (OPI vibes)
3) Add one small tool that improves neatness
If you struggle with flooded cuticles or messy edges, a tiny cleanup brush (used with alcohol/cleanser before curing) changes everything. Clean edges = fewer chips.
4) Upgrade removal comfort (your nails will thank you)
If you’re doing gel regularly, make removal part of your routine:
- fresh 100% acetone
- good wraps/clips
- cuticle oil after every removal
One underrated secret: clean brushes = cleaner manicures. Here’s exactly how to clean nail art brushes (gel + polish) without ruining the bristles.
Lamp 101: UV vs LED (What Matters for At-Home Gel)
This is the exact order I’d recommend if you want that clean, glossy, expensive-looking finish—without day-3 lifting.
Step 1: Prep (this decides wear time)
- Push back cuticles (remove the invisible cuticle film)
- Lightly buff the shine (don’t thin your nails—just matte the surface)
- Clean + dehydrate with alcohol on a lint-free wipe
Mini rule: after you cleanse, don’t touch your nails. Finger oils = lifting.
Step 2: Base coat (paper-thin grip)
- Apply a thin base coat and leave a tiny gap near the cuticle
- Cure fully
- Cap the free edge (tiny swipe over the tip)
Step 3: Color (thin coats = smooth, no wrinkles)
- Coat 1: thin → cure
- Coat 2: thin → cure
- If it looks streaky, do another thin coat—don’t go thick.
Step 4: Top coat (the “glass” finish)
- Apply an even top coat (light pressure—let it level)
- Cap the free edge again
- Cure fully
Step 5: Clean edges (optional but makes it look salon)
If you accidentally flood the cuticle:
- clean it before curing with a small brush + alcohol/cleanser
Messy edges cured = lifting later.
Day-5 “Fresh Gloss” trick (optional)
If your nails take a beating from typing/cleaning:
- add a thin refresher top coat around day 5–7 for that “just done” shine.
Best Gel Base Coat + Top Coat (The Longevity Pair)
Makartt Base + No-Wipe Top Coat Set (2pcs, 10ml) — The Longevity Pair for Glossy Gel Nails
ASIN: B07GXPZ768
What you’re getting: 1 base coat + 1 no-wipe glossy top coat (10ml each), UV/LED cure, soak-off, salon-style shine.
If your gel manicures look good on day one but start to lift at the cuticle, chip at the tips, or lose that “glassy” finish fast, this is the kind of unglamorous-but-essential duo that fixes it. A quality base coat helps gel grip the nail, and a no-wipe top coat seals everything with a smooth, high-shine finish—so your color looks fresher for longer.
Why it deserves a spot in your “Best Gel Nail Polish” article
- Makes any gel color last longer: This isn’t about shades—it’s about performance. A good base/top combo can upgrade budget gel sets instantly.
- No-wipe top coat = cleaner finish: No-wipe top coats cure to a glossy finish without that sticky inhibition layer step, so your manicure feels more “salon polished.”
- Chip-resistant focus: Especially helpful if your nails take a beating from typing, cleaning, or frequent handwashing.
Texture & performance notes (what to expect)
- Base coat: Think of this as your “grip layer.” Apply thinly—too much can cause lifting because gel needs to cure through evenly.
- Top coat: A good no-wipe top coat should feel smooth and glassy, not rubbery or dull. The shine is what makes even simple colors look expensive.
Who this set is best for
✅ Anyone whose gel polish peels early (often a base coat issue)
✅ People who want longer wear without changing their favorite gel brand
✅ DIY gel users who want a salon-look shine at home
✅ Minimalists who prefer buying essentials over more colors
Who should skip it
❌ If you don’t have a UV/LED lamp yet (this needs curing)
❌ If you only use regular polish (not gel)
❌ If your issue is mostly application technique (flooded cuticles/thick coats)—you’ll still need the quick prep rules
Pro tips to maximize wear (and avoid lifting)
- Prep matters: push back cuticles + lightly buff shine + wipe with alcohol
- Apply base coat paper-thin, leaving a tiny gap from the cuticle
- Cap the free edge with base and top coat (tiny swipe over the tip)
- Cure fully (under-curing = peeling)

Best for: locking in that glassy, salon-fresh finish—great when you want longer wear and fewer chips with soak-off removal.
As an Amazon Associate, PremiumGlows may earn from qualifying purchases — at no extra cost to you.
Best Gel Nail Polish for Short Nails
Beetles Nude Jelly Gel Polish Set (6 Colors, “Drunken Rose” Collection) — Best Gel Nail Polish for Short Nails
ASIN: B0DP8JXRYS
What you’re getting: 6 sheer jelly gel shades (nude pinks + browns + neutrals), soak-off, UV cure, glossy finish.
If you wear your nails short (or they’re in that “growing out” stage), jelly nudes are the ultimate cheat code. They make nails look healthy, clean, and softly polished—without emphasizing every brush stroke the way opaque creams sometimes do. This Beetles set is especially good because the color story stays in that flattering zone: nude pinks, neutral browns, and rosy tones that look tidy and expensive on short nails.
Why it earned “Best for Short Nails”
- Sheer jelly finish is forgiving: You get a smooth, blurred look even if your application isn’t perfect.
- Short nails look longer: Jelly nudes create a softer edge and a more “natural nail” illusion.
- Wearable neutrals: These shades match everything and look elevated in photos (Pinterest-friendly).
- 6-piece set feels curated: It reads more “editor-picked” than a 30+ color box.
Texture & performance notes (what to expect)
Because these are jelly / translucent gels, the goal isn’t a thick, opaque block of color. The prettiest result usually comes from:
- 1 coat: barely-there tint (your-nails-but-better)
- 2 coats: noticeable nude glow (most flattering)
- 3 coats: deeper nude (still soft, but more coverage)
Apply in thin coats and cure fully. Jellies look best when they’re smooth and even—not thick.
Who this set is best for
✅ Short nails and natural nails (everyday “clean” manicure)
✅ Beginners who want a polish that still looks good even with simple technique
✅ Anyone who loves the jelly nude / lip-gloss nails vibe
✅ People who want a neutral palette for work, school, or minimal style
Who should skip it
❌ If you want fully opaque, one-coat coverage
❌ If you love bold colors (this is a neutral-only wardrobe)
❌ If you don’t have a UV/LED lamp (needed for curing)
Pro tips (make jelly nudes look ultra-salon)
- Keep coats thin and let the gel self-level for a few seconds before curing
- Cap the free edge (especially important on short nails)
- Finish with a glossy no-wipe top coat for that “glass nail” shine

Best for: that sheer “lip-gloss nails” look—milky nude pinks + soft browns you can layer for a clean, expensive-looking finish.
As an Amazon Associate, PremiumGlows may earn from qualifying purchases — at no extra cost to you.
How to Remove Gel Nail Polish Safely (Without Damage)
The #1 reason nails feel thin or “wrecked” after gel isn’t the polish—it’s peeling and scraping. The safest removal is slow, gentle, and soak-off. When you remove gel the right way, your nails stay smooth, strong, and ready for the next manicure.
Before You Remove: What you need (simple kit)
- 100% acetone (not regular remover)
- Cotton pads or cotton balls
- Foil wraps (or soak-off clips)
- Nail file (180 grit is perfect)
- Orangewood stick or a gentle cuticle pusher
- Buffer (optional, very light use)
- Cuticle oil + a rich hand cream
Quick rule: If you’re tempted to peel, stop. Peeling pulls up layers of your natural nail (that’s the “damage” feeling).
Step-by-step soak-off removal (the healthiest method)
Step 1: Break the shine (don’t file your nail thin)
Use a nail file to gently remove the glossy top coat. You’re not filing down your natural nail—you’re just roughing up the surface so acetone can penetrate. When the shine is gone, stop.
Step 2: Soak with acetone (10–15 minutes)
Saturate cotton with 100% acetone, place it on the nail, then wrap firmly with foil (or use soak-off clips). Set a timer for 10–15 minutes. Warmth helps—so you can rest your hands under a towel.
Step 3: Slide off the softened gel (no scraping)
Remove one wrap at a time. The gel should look bubbly and lift easily. Use an orangewood stick to gently push product off the nail.
- If it doesn’t move easily, re-wrap and soak for 5 more minutes.
- Never gouge the nail plate—pressure is what causes thinning and soreness.
Step 4: Clean up + rehydrate (this is where nails “recover”)
Once the gel is off, wash hands, then apply cuticle oil and a thick hand cream. If you want, you can lightly buff any tiny remaining bits—just don’t chase perfection with heavy buffing.
Common removal mistakes (and what to do instead)
- Mistake: Peeling gel off in one satisfying sheet.
Do instead: Soak until it slides off with minimal effort. - Mistake: Filing aggressively to “get it over with.”
Do instead: File only the shine/top coat, then let acetone do the work. - Mistake: Scraping with metal tools.
Do instead: Use wood or a gentle pusher and re-soak if needed. - Mistake: Removing gel, then immediately reapplying without care.
Do instead: Hydrate first; if nails feel sensitive, take a 24–48 hour break.
Removing builder gel or thicker overlays
Builder gel is thicker than regular gel polish, so removal may take longer. The safest approach is the same—file the top layer down gently (just enough to thin it), then soak-off. If it still resists, do another 5–10 minute soak cycle rather than scraping.
Aftercare: keep nails strong between gel sets
- Apply cuticle oil daily (especially after handwashing).
- Use a hand cream at night to reduce dryness and splitting.
- If nails feel thin, wear a clear strengthening base coat for a few days before your next gel set.
- Keep nails slightly shorter for a week—less leverage = fewer breaks.
Reader reassurance: If your nails feel rough right after removal, don’t panic. A few days of oil + cream usually makes them look smoother and healthier again—especially if you avoid buffing them aggressively.
Pro Tips for a Chip-Free Gel Manicure
Chip-free gel isn’t about buying the most expensive color—it’s about tiny technique upgrades that make your manicure look freshly done for days. Think: clean edges, thin layers, full curing, and a sealed tip. Do those right, and even budget gels wear like a pro set.
1) Prep like a pro (this is where wear time is decided)
- Push back cuticles and remove invisible cuticle film on the nail plate (gel won’t grip over it).
- Lightly buff the shine—just enough to matte the surface. Over-buffing = weak, bendy nails.
- Dehydrate nails with alcohol on a lint-free pad (oils = lifting).
2) Thin coats win (thick gel is the #1 chip trigger)
The cleanest, longest-lasting gel manicures come from 2 thin color coats—not one thick one. Thick gel can wrinkle, cure unevenly, and lift faster.
- Wipe excess product off one side of the brush before applying.
- Let gel self-level for a few seconds, then cure.
- If the color looks streaky, do another thin coat instead of making the next one thick.
3) Keep gel off the skin (flooded cuticles = instant lifting)
If gel touches your skin, it creates a “bridge” that lifts as your hands move—then water gets underneath, and peeling starts.
- Leave a hairline gap at the cuticle and sidewalls.
- If you flood, clean the edge before curing with a small brush + alcohol/cleanser.
A small liner/cleanup brush helps you tidy edges before curing—see my nail art liner brush guide.
- Don’t cure messy edges “hoping it’ll be fine.” That’s how chips happen on day 3.
4) Cure fully (under-curing = soft layers that peel)
A manicure can look dry on top but still be under-cured underneath—especially with dark shades, thick coats, or weaker lamps.
- Follow the brand’s cure time—and don’t rush it.
- Place your hand flat and centered in the lamp (thumbs are the usual under-cure culprit).
- If you’re using deeper shades (reds, browns), cure a touch longer and keep coats extra thin.
5) Cap the free edge (the “chip-proof” secret)
The free edge is where wear starts. Sealing it—properly—stops tips from fraying and keeps polish from lifting.
- Run a tiny swipe of base coat over the tip.
- After color, seal the tip again with top coat.
- Keep it neat—too much product on the edge can feel thick and chip faster.
6) Top coat tricks for extra days of shine
- Use a no-wipe top coat for the glossiest, “glass nail” finish.
- Float the top coat (light pressure) so it levels smooth instead of dragging.
- If your nails take a beating, do a thin refresher top coat on day 5–7 for a “just done” reset.
7) Real-life protection (because life chips gel)
- Wear gloves for cleaning and hot water (heat + chemicals shorten wear).
- Use your knuckles—not your nails—to open cans, peel stickers, and press buttons.
- Apply cuticle oil daily (flexible nails crack less and keep edges smoother).
Read: how to remove gel nail polish at home safely. Healthy removal is what keeps readers coming.
FAQs: Best Gel Nail Polish
What is the best gel polish?
The “best” gel nail polish is the one that fits your routine and gives you consistent, smooth results. For most at-home users, that means a shade that’s easy to apply (like a sheer jelly nude) plus a reliable base + no-wipe top coat for long wear. If you want one wear-everywhere pick, a soft nude pink jelly is the most flattering, forgiving option—and it always looks clean and expensive.
What are the best gel nail polish brands?
The best gel nail polish brands are the ones that cure evenly, level smoothly, and don’t require “perfect technique” to look salon-finished. In this guide, I focused on:
- At-home favorites: beginner-friendly and great value (especially for kits).
- Pro upgrade brands: more consistent formula/finish for that “salon” look.
- Longevity essentials: base + top coats that keep any gel looking fresh longer.
If you’re building a small, smart gel wardrobe, start with one signature nude, one classic red, and a strong base/top coat duo. Those three do the heavy lifting.
How long does gel nail polish last?
With good prep and proper curing, gel typically lasts 7–14 days. Some people get longer—but for most at-home manicures, two weeks is the realistic sweet spot before growth shows or tips start to wear.
What affects wear time the most:
- Prep: cuticles pushed back + nail surface lightly buffed + nails cleaned/dehydrated
- Thin coats: thick gel lifts and wrinkles faster
- Base + top coat quality: they decide grip + seal
- Habit factors: lots of handwashing, cleaning chemicals, and hot water can shorten wear
Is gel nail polish safe for nails?
Gel can be nail-safe when you do two things consistently: apply carefully (avoid skin + don’t over-buff) and remove gently (soak-off, never peel). Most “damage” people blame on gel is actually from aggressive removal, picking, or scraping.
Nail-health rules that matter:
- Don’t peel gel off—peeling removes layers of your nail.
- Buff lightly (just remove shine, not thickness).
- Take breaks if your nails feel thin or tender.
- Use cuticle oil between manicures to keep nails flexible and less prone to splitting.
What’s the best way to remove gel nail polish?
The best way is soak-off removal: gently file the top coat to break the seal, then soak with acetone using wraps or cotton + foil. Once the gel softens, it should lift easily—no digging, no ripping, no drama.
Quick reminder: If you have your removal guide, link it here: how to remove gel nail polish at home safely. It keeps readers’ nails healthy and reduces “gel damaged my nails” complaints.
Do I need a UV or LED lamp?
For true gel, yes—you need a lamp to cure it. If you don’t want a lamp, look for gel-effect polish instead (it’s regular polish designed to look extra glossy and “gel-like,” but it air-dries).
UV vs LED: LED lamps cure faster and are the most common for at-home kits. Some gels say “UV/LED” because they’re compatible with both.
Why is my gel polish peeling?
Peeling is almost always a technique or prep issue—not the color. The most common causes:
- Cuticle film left on the nail: gel can’t grip, so it lifts near the base.
- Oily nails: not cleansing/dehydrating before base coat.
- Thick coats: gel doesn’t cure through properly and lifts faster.
- Gel on skin: flooding cuticles creates an easy “lift point.”
- Not capping the free edge: tips wear down and start the chip/peel chain reaction.
- Under-curing: soft layers underneath = early lifting.
Fast fix: Do a cleaner prep, apply thinner coats, keep gel off skin, cap the free edge, and cure fully. Those five changes solve most peeling issues immediately.
How to Apply Gel Nail Polish at Home (So It Lasts)
A long-wearing gel manicure isn’t about piling on more polish—it’s about prep + thin layers + full curing. Get those three right, and your gel stays glossy, smooth, and chip-resistant instead of peeling at the cuticle by day three.
Below is the exact “at-home salon” method I recommend for most DIY gel users—especially if you type a lot, wash hands often, or your nails tend to bend and lift.
Prep: The 3 Steps That Prevent Peeling
Most peeling starts before you even open the color. Gel lifts when it can’t properly grip the nail plate—usually because of cuticle residue, shine/oil, or moisture. These three steps fix that.
- Push back cuticles (and remove invisible cuticle film).
Use a cuticle pusher, then gently wipe away the thin “seal” on the nail plate. That invisible film is one of the biggest causes of lifting near the cuticle. - Lightly buff the shine.
Quick, gentle buffing gives gel something to hold onto. You’re not thinning your nails—you’re just removing surface shine so the base coat can grip. - Clean + dehydrate.
Wipe nails with alcohol (or a nail dehydrator) on a lint-free pad. This removes oils and moisture so your base coat bonds better.
Mini rule that saves manicures: After you cleanse, don’t touch your nails with your fingers. Skin oils = instant grip problem.
Leave a Reply