Gel manicures are gorgeous… right up until removal day.
If you’ve ever tried to “just peel it off” (we’ve all been tempted), you already know how quickly that can leave nails feeling thin, bendy, and rough. The good news: learning how to remove gel nail polish at home safely is mostly about using the right method—and not rushing the parts that protect your natural nail.
In this guide, you’ll learn:
- The safest at-home removal method (the one salons use)
- Gentler alternatives when you want to avoid acetone (and when they actually work)
- What not to do (the 3 mistakes that cause most damage)
- Aftercare that makes nails feel healthy again
Important note: This guide is for soak-off gel polish. If you have hard gel / builder gel / acrylic overlays, those don’t soak off the same way—you’ll need filing (or pro removal).
TL;DR
Fast + safe method: File → acetone cotton → foil wrap → wait → gently push off → hydrate.
- File the shine off (only the top coat) until it looks matte
- Protect skin with cuticle oil or a thin layer of petroleum jelly
- Soak cotton in 100% acetone, place on nail
- Wrap with foil (snug = better)
- Wait 10–15 minutes, then check one nail
- Gently push off lifted gel (re-wrap if it’s not ready)
- Buff lightly + oil + cream to rehydrate
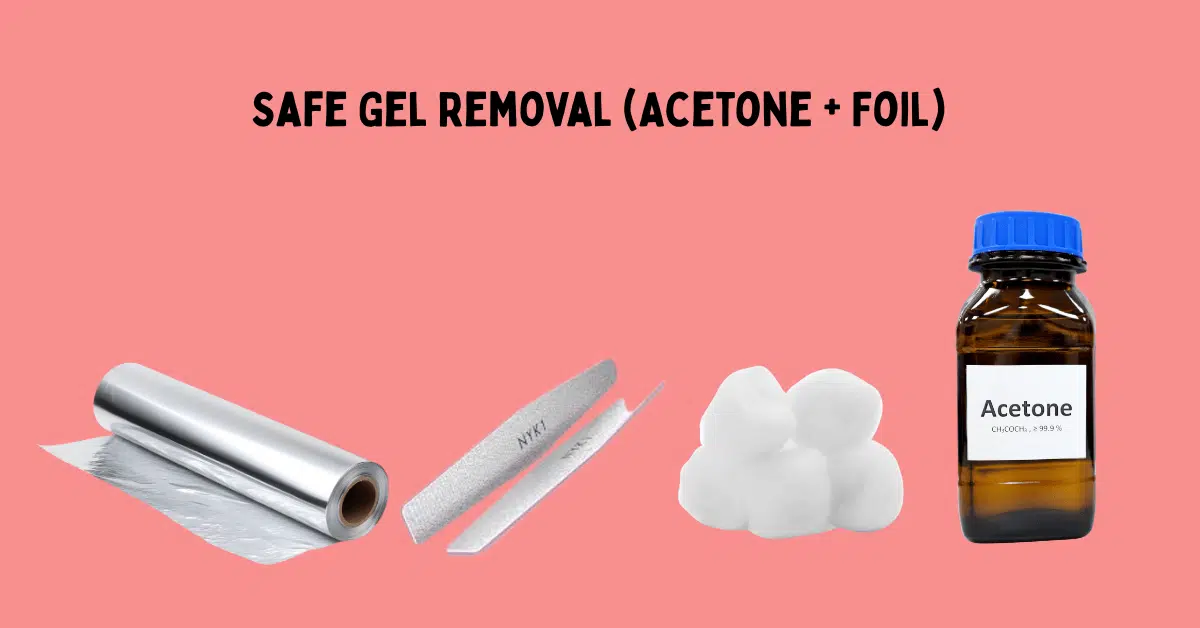
What you need to remove gel nail polish at home
Before you start, set everything out on a towel (this makes the process faster and keeps acetone off your table).
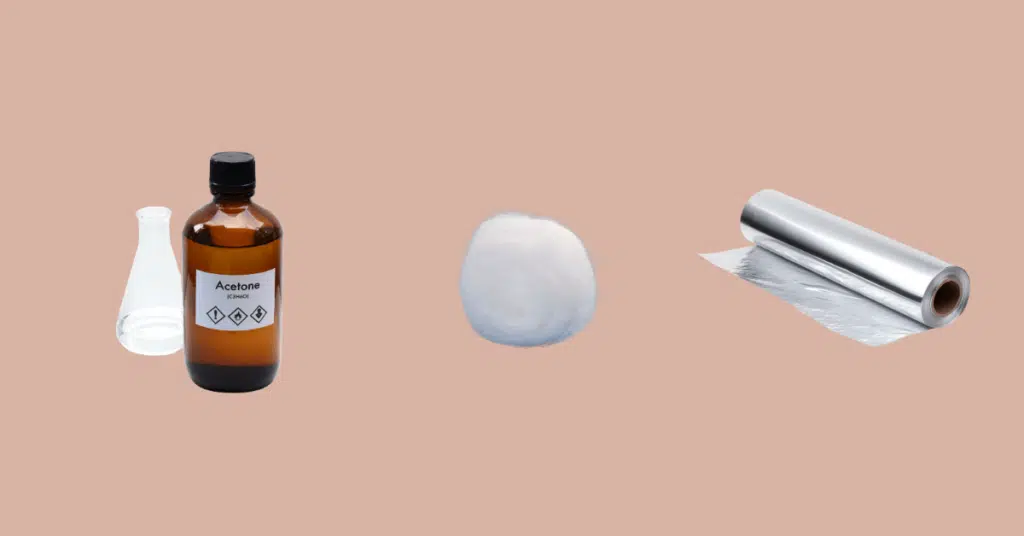
Essentials for the acetone + foil method
- 100% pure acetone (this is the one thing that actually breaks down gel)
- Nail file (100/180 grit)
- 100 grit: to remove the shine/top coat
- 180 grit: to tidy shape after
- Cotton balls or cotton pads (cotton balls are easiest to mold to the nail)
- Aluminum foil (cut into small squares, about 3×3 inches)
- Cuticle pusher (plastic or orange wood stick) (for gentle lifting only)
- Buffer block (fine grit) (to smooth after removal—lightly)
- Cuticle oil + hand cream (aftercare is non-negotiable)
“Makes it easier” extras (highly recommended)
- Petroleum jelly (or thick balm) to protect skin around nails from acetone dryness
- Lint-free wipes (cleaner than tissue; no fuzz)
- Small glass bowl/dish (for acetone if needed)
- Nail clipper (if your nails are long—shorter nails remove faster)
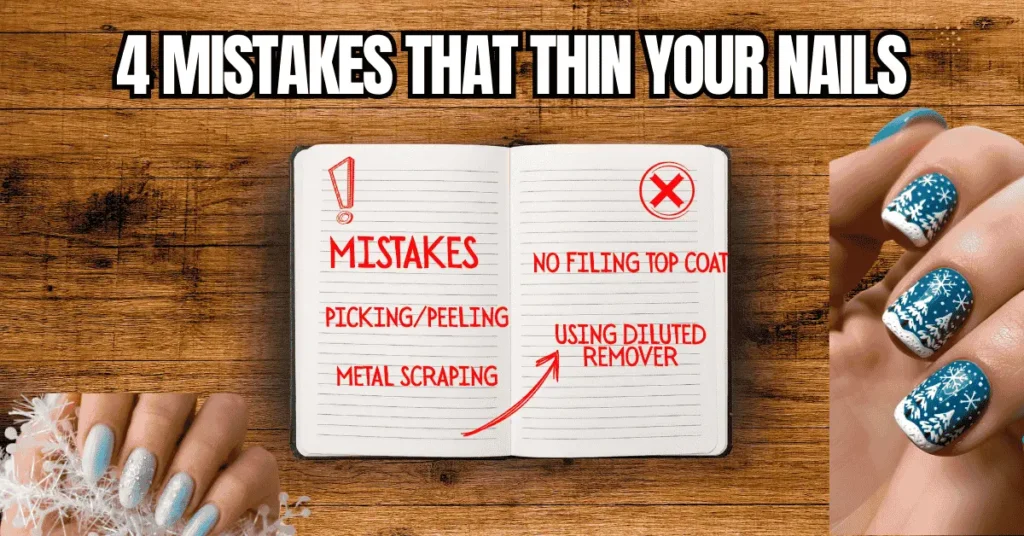
What NOT to use (common mistakes)
- Regular nail polish remover (usually too diluted to remove gel efficiently)
- Metal scraping tools (they can gouge your nail plate)
- Hot water soaks as a “replacement” for acetone (not reliable for true gel)
How to remove gel nail polish at home (acetone + foil method)
This is the most reliable at-home method because it softens gel evenly—without ripping layers off your natural nail.
Step 1: Protect your skin (30 seconds)
Rub petroleum jelly or thick cuticle oil around the nail folds and cuticles (avoid coating the gel itself).
This creates a barrier so acetone doesn’t leave your fingers feeling paper-dry.
Step 2: File off the shine (the “break the seal” step)
Using a 100-grit file, gently file the surface until the top coat looks fully matte (no glossy spots).
- Don’t over-file into your natural nail.
- You’re just removing the “seal” so acetone can penetrate.
Step 3: Soak cotton with acetone
Saturate cotton with 100% acetone. It should be very wet but not dripping.
Step 4: Wrap each nail (cotton first, then foil)
Place the acetone-soaked cotton directly on the nail.
Wrap with foil snugly so it holds heat and stays in place.
Step 5: Wait 10–15 minutes
Let it sit 10–15 minutes.
If your room is cold, aim closer to 15 (gel softens faster with warmth).
Step 6: Unwrap one nail and “slide” gel off gently
Start with one finger:
- The gel should look wrinkled, flaky, or lifted.
- Use an orange wood stick / plastic pusher to gently nudge it off.
If it doesn’t move easily: rewrap for 5 more minutes.
Never scrape hard—that’s how nails get thin and sore.
Step 7: Light buff + rinse + oil
Once gel is off:
- Lightly buff with a fine buffer only if needed for residue.
- Wash hands.
- Apply cuticle oil generously, then a thick hand cream.
How to remove gel nail polish at home without acetone (gentler options)
First—honest truth from an “I want healthy nails” perspective:
If your gel manicure is fresh, fully sealed, and still perfect, non-acetone methods usually won’t remove it completely. They work best when the gel is already lifting, chipped, or you used a peel-off base coat.
That said, here are the safest gentler options (with realistic expectations).
Option 1: The oil-soak method (best “gentle” choice)
This is the most moisturizing alternative and can help loosen gel that’s already starting to lift.
How to do it
- File off the top coat (this step still matters)
- Warm a bowl of cuticle oil / olive oil / coconut oil (warm, not hot)
- Soak fingertips for 20–30 minutes
- Use a cuticle stick to gently lift edges that are already loose
- Repeat if needed (this one is slow, but nail-friendly)
Best for: sensitive skin, brittle nails, gel that’s already peeling at the edges
Not great for: brand-new gel that’s bonded tightly
Option 2: Warm water + dish soap soak (most mild, least reliable)
This can soften the gel’s edges, but it’s not a true “dissolver.”
How to do it
- File off the top coat
- Bowl of warm water + a few drops of dish soap
- Soak nails 20 minutes
- Gently push at lifted areas only
- Re-soak if needed
Best for: very sensitive skin, light lifting gel
Reality check: many people still need acetone to fully remove gel.
Option 3: “Peel-off” removal (ONLY if you used peel-off base)
If your gel was applied over a peel-off base, removal is simple—oil + gentle lifting.
How to do it
- Apply oil, wait a few minutes
- Lift from an edge with a wooden stick
- Go slowly; don’t yank
Best way to remove gel polish fast (when it won’t budge)
If your gel is clinging for dear life after 10–15 minutes, don’t panic—and definitely don’t start scraping. Stubborn gel usually means one of these things: the top coat wasn’t filed enough, the acetone wasn’t strong enough, or the wrap wasn’t tight/warm.
Here’s how to speed it up safely.
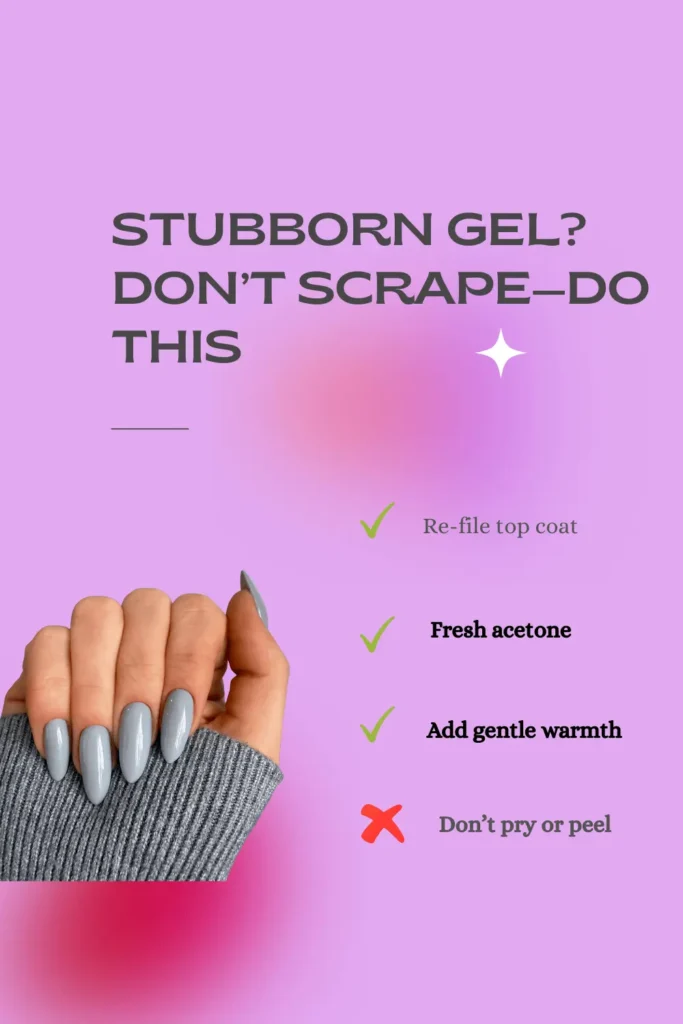
1) Re-file the top coat (the #1 fix)
If there are still shiny spots, acetone can’t penetrate properly.
Do a quick pass with your file until everything looks fully matte again.
2) Use fresh 100% acetone (and re-wet the cotton)
Cotton dries out fast. If it feels even a little dry, replace it with a freshly saturated piece.
Also make sure it’s 100% acetone, not diluted remover.
3) Wrap tighter (snug = faster)
Loose foil = less contact = slower softening.
Wrap the foil so the cotton stays pressed firmly against the nail.
4) Add gentle warmth (huge difference)
Warmth helps acetone work faster—without extra damage.
Safe ways to add heat
- Rest your wrapped fingers on a warm towel
- Use a heating pad on low under your hands
- Hold a warm (not hot) rice sock over your fingertips
Avoid very hot water or direct heat (you don’t want burns or leaking wraps).
5) Work one hand at a time
This keeps the acetone wraps from sitting too long while you fight the other hand.
6) If it still resists: rewrap, don’t scrape
If the gel doesn’t slide off with light pressure, it’s not ready.
Rewrap that nail for 5 more minutes and try again.
How to remove gel nail polish from toes
Toe gel removal is the same concept as fingers—file, soak, wrap, lift gently—but toes are trickier because they’re cooler (gel softens slower) and wraps slip off easier.
Step 1: File the top coat thoroughly
Toenails are often thicker, so make sure you file until the gel is fully matte.
Step 2: Protect skin
Apply cuticle oil or petroleum jelly around the nail folds to reduce acetone dryness.
Step 3: Choose the easiest “stays-on” wrapping method
Pick one:
Option A: Cotton + foil (classic)
- Use a small piece of acetone-soaked cotton on each toenail
- Wrap each toe with foil snugly
Option B: Cotton + plastic wrap (great for all toes at once)
- Place acetone-soaked cotton pads across toes
- Wrap the whole front of the foot with plastic wrap
- Add a sock to hold it in place (seriously—it works)
Step 4: Soak a little longer
Feet are cooler, so soak 15–20 minutes instead of 10–15.
Step 5: Lift gently, rewrap if needed
Use a wooden stick to nudge gel off only when it looks lifted/wrinkled.
If it’s stuck: rewrap that toe for 5 more minutes.
Step 6: Aftercare matters even more for toes
Wash, then apply:
- Cuticle oil
- A rich foot cream
If you can, wear socks for an hour to “seal in” the moisture.
Aftercare: how to rehydrate nails after gel removal
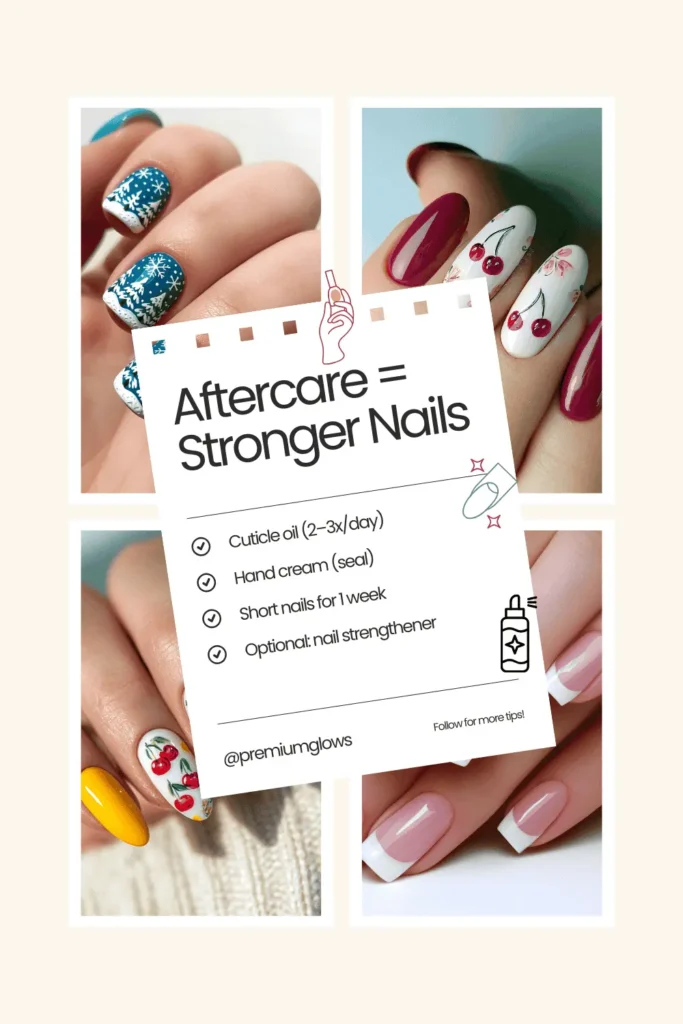
Gel removal is drying—even when you do it perfectly. The difference between “my nails feel normal” and “my nails feel thin and bendy” is what you do in the next 24–72 hours.
Follow oil with a rich hand cream (or foot cream for toes). If your hands feel extra dry afterward, you’ll love this guide: best moisturizers for dry, flaky skin.
Step 1: Wash and reset
Rinse hands/feet with gentle soap and water to remove acetone residue, then pat dry.
Step 2: Cuticle oil (right away—and more than once)
Massage cuticle oil into:
- cuticles
- sidewalls
- the nail plate itself
Do this 2–3 times a day for the next 2–3 days.
Step 3: Seal it with a thick cream
Follow oil with a rich hand cream (or foot cream for toes).
Think: buttery, barrier-style texture, not a lightweight lotion.
Step 4: Smooth lightly if needed (don’t over-buff)
If your nails feel rough:
- use a fine buffer very lightly
- stop as soon as it feels smooth
Over-buffing makes nails thinner and more fragile.
Step 5: Give nails a short “recovery window”
If you can, avoid another gel manicure for at least 5–7 days.
During the break:
- keep nails slightly shorter
- apply oil daily
- consider a strengthening base coat (optional)
Step 6: If nails feel weak, protect them
Wear gloves for cleaning/dishes for a couple days. Water + detergents can make freshly stripped nails feel even softer.
Mistakes that damage nails during gel removal
If you remember one rule: never peel—re-soak instead.
Most “gel damage” isn’t from gel polish—it’s from removal mistakes that peel, scrape, or over-file the natural nail plate. Avoid these and your nails stay smooth, strong, and not painfully thin.
If your skin around the nails feels irritated after removal, keep your routine gentle for a day or two—here’s a simple guide on avoiding irritation when layering actives: Can I Use Salicylic Acid with Retinol?
1) Peeling or picking the gel off
This is the fastest way to wreck nails because gel often lifts with layers of your natural nail attached.
Do this instead: Soak longer. If it doesn’t slide off easily, it’s not ready.
2) Scraping hard with a metal tool
If you’re digging to “get the last bits,” you’re basically sanding the nail plate.
Do this instead: Use a wooden stick or plastic pusher with light pressure—and rewrap if needed.
3) Filing too aggressively (or using an e-file without skill)
Heavy filing makes nails feel hot, thin, and bendy.
Do this instead: File only the shine/top coat. Stop when it turns matte.
4) Using diluted nail polish remover
Most “removers” are too weak for gel. You end up soaking longer and getting more dryness with less payoff.
Do this instead: Use 100% acetone for quickest removal time.
5) Letting acetone cotton dry out mid-soak
Dry cotton = uneven removal = more scraping temptation.
Do this instead: Re-wet or replace cotton if it feels dry.
6) Skipping aftercare
Acetone pulls moisture fast. If you don’t replace it, nails can feel brittle for days.
Do this instead: Oil + rich cream right after, and daily for a couple days.
FAQs
Is it safe to remove gel nail polish at home?
Yes—if you use 100% acetone, file only the top coat, and remove the gel with gentle pushing (not peeling or scraping). The damage usually comes from forcing it off.
How long does it take to remove gel polish at home?
Typically 20–30 minutes total, including prep, soaking (10–15 minutes), cleanup, and aftercare. Toenails can take 15–20 minutes to soak because they’re thicker and cooler.
Can I use rubbing alcohol to remove gel polish?
No. Isopropyl alcohol won’t dissolve gel polish the way acetone does—it mostly just dries out skin and nails.
What is the best way to remove gel polish from natural nails?
The acetone + foil soak-off method is the most effective and nail-safe because it minimizes force and reduces the temptation to scrape.
How can I make acetone work faster?
Three things help:
- File the top coat until matte
- Use fresh 100% acetone
- Add gentle warmth (warm towel/heating pad on low)
Why won’t my gel polish come off even after soaking?
Usually because:
- the top coat is still sealed in spots (needs more filing), or
- the cotton dried out, or
- the wrap wasn’t snug enough
Re-file, re-wet, rewrap for 5 more minutes—don’t scrape.
Related reading on PremiumGlows
- Best Hand Creams for Dry, Cracked Hands (Clean + Affordable Luxury Picks)
- How to use nail art Brushes
- Nail Art Brushes for french tips
- Best Professional Nail Art Brushes for Perfect Design
Final thought
Gel removal at home doesn’t have to be a “pick-and-pray” situation. When you follow the right order—file the top coat, soak with 100% acetone, wrap snugly, then gently push off what’s already lifted—your nails stay smooth and strong instead of thin and tender. Take the extra two minutes to oil your cuticles and moisturize after, and you’ll keep that healthy, glossy nail look long after the polish is gone.
Leave a Reply